Author: angelinaakisti

  • The Bulking Smash-Burger Bowl

    The Bulking Smash-Burger Bowl

    Recipe · Bulking / Beef / High-protein

    The Bulking Smash-Burger Bowl

    All the joy of a smash burger, built into a bowl that actually fuels a bulk — 51 grams of protein and 780 calories, crisp-edged beef over rice with a proper burger sauce. No bun to fill you up before the macros do.

    GoalBulk
    Total time25 min
    Servings2 bowls
    Protein / serving51 g
    Calories / serving780 kcal
    A smash-burger bowl with crisp-edged beef, rice, melted cheese and burger sauce, plated under cold light Plate 01 / Finished

    I love a smash burger. I won’t pretend otherwise. There’s something about beef pressed thin and screaming hot on a pan, the edges going dark and lacy, the cheese melting into the cracks — it’s one of the great small pleasures of cooking. The trouble, when you’re trying to grow on purpose, is that the bun and the side of fries push the whole thing into territory where you eat half of what you need and feel full of bread.

    So one evening I just left the bun in the drawer. I smashed the patties the same way, built the same tangy sauce, and dropped it all over a bowl of rice instead. And honestly? It was better. The crisp beef edges and the soft rice and the cool sauce all in one spoonful — it ate like a burger and a rice bowl had a beautiful baby. And because there was no bun stealing my appetite, I could actually finish a portion that did the job.

    This is the bulking smash-burger bowl, love. It’s fast, it’s loud with flavour, and the macros are genuinely good — over 50 grams of protein and the kind of calories that help you grow without forcing yourself. I make it when I want my training food to feel like a treat instead of a chore. Cook it once and you’ll understand why the bun never made it back. I’ve got you on this.

    01Who it’s for & when to eat it

    The beef and sauce stay the same across every goal — you just move the rice and cheese up or down. Here’s how I steer it.

    On a bulk

    The default bowl

    A full portion of rice, two smashed patties’ worth of beef, the cheese and the sauce. Dense, satisfying calories that still land over 50g of protein. My go-to on a hard training day.

    On a cut

    Lean it out

    Use 5% lean beef, drop the rice for a base of shredded lettuce and pickles, keep the sauce light. You get the whole burger experience for a fraction of the calories. See the variations below.

    On TRT

    Balanced bowl

    A moderate scoop of rice, normal beef, a little cheese, plenty of veg under it. Balanced fuel that satisfies the burger craving without overshooting the day.

    Timing: this is a fantastic post-training meal — fast protein, easy carbs to refill the tank. It also packs well for lunch, though the beef is at its crispy best fresh off the pan.

    02Ingredients

    Makes 2 bowls. The smash is the heart of it — get the pan properly hot and don’t crowd the beef. Scale every line in proportion if you’re feeding more.

    Servings 2 · adjust on the live recipe card
    • Lean beef mince 10% fat300 g · 10.6 oz
    • Cooked rice300 g · 10.6 oz
    • Reduced-fat cheese slices2 slices
    • Light mayonnaise2 tbsp · 30 g
    • Tomato ketchup1 tbsp · 15 g
    • Yellow mustard1 tsp · 5 g
    • Dill pickles, chopped2 tbsp
    • Shredded lettuce2 handfuls
    • Onion, finely diced½ small
    • Salt & black pepperto taste

    Swaps I actually use: 5% lean mince drops the fat hard for a cut; full-fat eats richer on a bulk. Swap the rice for cauliflower rice to cut calories, or for a higher-protein base use a 50/50 mix of rice and lentils. No reduced-fat cheese? A regular slice adds a little fat but melts beautifully. For the sauce, Greek yoghurt in place of half the mayo lifts the protein and cuts the fat.

    03Step by step

    The sauce

    Mix the burger sauce first

    Stir the mayo, ketchup, mustard and chopped pickles together in a small bowl with a pinch of pepper. Taste it — it should be tangy and a little sharp. Set it aside so the flavours mingle while you cook.

    Magnus says: this sauce is what makes it taste like a burger and not just beef on rice. Don’t skip it.

    Burger sauce being stirred together in a small bowl with chopped pickles
    Portion the beef

    Loose balls, not packed

    Divide the mince into four loose balls. Don’t compact them — a loose ball smashes into more surface area, and surface area is where all that dark, crispy flavour comes from. Season the tops with salt and pepper.

    Four loose balls of beef mince portioned and seasoned on a board
    Smash

    Hot pan, hard press, leave it

    Get a heavy pan ripping hot. Lay the balls in and immediately press each one flat with a spatula — really lean on it for ten seconds. Then leave them alone. You want a deep brown crust before you touch them, about two minutes.

    Magnus says: the pan must be hot enough to make you slightly nervous. That’s the secret to the crispy edges.

    Beef patties pressed flat on a screaming-hot pan with dark crisp edges forming
    Flip & cheese

    Turn, top with cheese, melt

    Flip the patties, lay a half-slice of cheese on each, and cook another minute until the cheese slumps and melts. Throw the diced onion into the pan beside them for the last thirty seconds to soften and catch some of the beef fat.

    Smash patties flipped with melting cheese on top and onions softening alongside
    Build the bowl

    Rice down, beef on top, lettuce, sauce

    Spoon the warm rice into two bowls. Pile the cheesy beef on top, scatter over the cooked onion and shredded lettuce, then spoon the burger sauce generously over everything.

    The bowl being assembled with rice, cheesy beef, lettuce and burger sauce
    Serve

    Extra pickles, eat it hot

    Finish with a few more chopped pickles for crunch and a crack of pepper. Eat it straight away while the beef edges are still crisp and the cheese is gooey.

    Magnus says: get a bit of everything on the spoon — crispy beef, soft rice, cool sauce. That’s the whole point.

    The finished smash-burger bowl topped with extra pickles and pepper under cold light

    04The spec sheet

    Real numbers, calculated — not guessed. The recipe makes 2 bowls, about 720g of finished food total. Here’s what one serving (~360g) and a flat 100g actually give you.

    Macros — per serving & per 100g
    NutrientPer servingPer 100g
    Energy780 kcal217 kcal
    Protein51.0 g14.2 g
    Carbohydrate62.0 g17.2 g
    — of which sugars6.0 g1.7 g
    Fat33.0 g9.2 g
    — of which saturates11.0 g3.1 g
    Fibre3.0 g0.8 g
    Sodium~0.95 g~0.26 g
    Calorie density
    217 kcal / 100g

    Moderate-to-high. Dense enough to make a surplus easy without forcing a huge volume of food — handy when the appetite isn’t quite keeping up with the training.

    Protein per 100 kcal
    6.5 g / 100 kcal

    Solid for a burger-style meal. The lean beef carries it; on a deeper cut, switching to 5% mince pushes this ratio higher still.

    Key micros (per serving, approx.)
    • Iron~4.5 mg · 25% DV
    • Zinc~9 mg · 82% DV
    • Vitamin B12~2.6 µg · 108% DV
    • Selenium~28 µg · 51% DV
    • Niacin (B3)~9 mg · 56% DV
    • Phosphorus~360 mg · 51% DV

    Macros are calculated from standard food-composition data and will shift a little with your exact ingredients and brands. Micronutrient figures are estimates against general adult Daily Values. Numbers are for guidance, not medical advice — see our Nutrition Disclaimer.

    05Bulk / Cut / TRT variations

    One smash, three jobs. The beef and sauce stay the same — you move the rice, the cheese and the fat level of the mince. Macros below are for a full serving.

    Bulk

    The full bowl

    The recipe as written — full rice, 10% beef, cheese and sauce. Add a second slice of cheese or an extra spoon of rice if you need the calories higher. Comforting, dense fuel for growing.

    780Kcal
    51G Protein
    33G Fat
    Cut

    All the burger, fewer calories

    Use 5% lean mince, swap the rice for shredded lettuce and pickles, and lighten the sauce with Greek yoghurt. You keep every bit of the burger flavour for a fraction of the calories.

    360Kcal
    44G Protein
    16G Fat
    TRT

    Steady & balanced

    A moderate scoop of rice, normal beef, one slice of cheese, and a big base of veg under it all. Balanced fuel that satisfies the craving without overshooting your day.

    560Kcal
    47G Protein
    24G Fat

    06Meal prep & storage

    This packs well if you treat the parts right. The trick is keeping the crispy beef, the rice and the sauce a little separate so nothing goes soggy before you eat it.

    Fridge
    3 days

    Store the cooked beef and rice together in a box; keep the sauce and lettuce in separate little pots to add fresh.

    Freezer
    2 months

    The cooked beef freezes well. Freeze it flat in a bag and thaw overnight before reheating; add fresh rice and sauce after.

    Reheat
    3 min

    Reheat the beef and rice in a hot pan to crisp the edges back up, or microwave in a pinch. Add the cold sauce and lettuce last.

    For meal prep I batch the beef and rice on a Sunday and make a jar of the sauce to last the week. Two minutes in a hot pan brings the beef back to life, and the bowl tastes nearly as good as fresh.

    Free · the 7-day “Get Fed” plan

    Want a whole week built around food like this?

    Drop your email and I’ll send you my free 7-day plan — meals, macros already counted, grocery list written. No spam, no lectures.

    No spam. Unsubscribe whenever. See what’s in the plan →

    07Common questions

    What’s the trick to crispy smash-burger edges? +

    Three things: a properly hot heavy pan, loose balls of mince that aren’t compacted, and a hard press the moment they hit the heat — then leaving them alone to form a crust. If you press while they cook or move them too soon, you lose the crisp. Patience for two minutes is the whole game.

    Can I make this leaner for a cut? +

    Easily. Use 5% lean mince, swap the rice for shredded lettuce and pickles, and make the sauce with Greek yoghurt instead of most of the mayo. That takes a serving from around 780 calories down to roughly 360 while keeping the burger flavour and most of the protein. See the Cut variation above.

    What rice works best in the bowl? +

    Any cooked rice you like — white rice keeps it soft and neutral, which suits the rich beef. For more fibre and a slower-digesting carb, brown rice works too. To cut calories, swap in cauliflower rice; to bump protein, mix the rice half-and-half with cooked lentils.

    Can I cook the beef without a smash? +

    Yes — just brown the mince loose in the pan as crumbles instead. You lose the lacy crisp edges but it’s faster and still tastes great with the sauce. Season well and let some of it catch and brown on the pan for flavour.

    Is the burger sauce essential? +

    It’s what turns beef-on-rice into a smash-burger bowl, so I’d keep it. If you want it leaner, build it on Greek yoghurt; if you want it richer, use full-fat mayo. The pickles and mustard are doing the tangy work, so don’t leave those out even if you lighten the base.

    From my 7-day Bulk plan

    This bowl lives inside a full week of meals.

    This smash-burger bowl is one plate in my 7-day bulking plan — seven days of high-protein, calorie-dense meals with the macros counted and the grocery list written. You pick the goal; I do the maths.

    See the bulking meal plan
    A smash-burger bowl from the 7-day bulking meal plan under cold light

    08Pairs well with

    Browse all recipes →

    Magnus Olafsson in his kitchen — bald, bearded and broad, in his pink apron, under cold light
    About the author

    Magnus Olafsson

    I’m Magnus — twenty years under the iron, from a cold gym in Stockholm to the classic-physique stage, and now mostly in my kitchen in a pink apron. I’ve cut for shows, bulked through winters, and I’ve been on TRT since I was thirty-five. I know what it takes to eat for the body you’re chasing, and I know it shouldn’t come with a side of shame.

    Everything here is food I actually cook and macros I actually count. I don’t diagnose, I don’t promise, and I never make a number up. I just feed you well and tell you the truth.

    NPC Illinois NPC Classic Physique On TRT since 35 20 years training

    Slim Diet Era shares recipes and general nutrition information. It is not medical or dietetic advice, and we do not provide guidance on obtaining or using any controlled substance. See our Medical Disclaimer and Nutrition Disclaimer.
  • Creamy Chicken Pasta (the bulk one)

    Creamy Chicken Pasta (the bulk one)

    Recipe · Bulking / Pasta / High-protein

    Creamy Chicken Pasta (the bulk one)

    A proper creamy chicken pasta that loves you back on a bulk — 53 grams of protein and 710 calories a plate, with the sauce made from cottage cheese instead of a tub of double cream. Big, comforting, and easy to eat a lot of when you’re trying to grow.

    GoalBulk
    Total time30 min
    Servings2 big plates
    Protein / serving53 g
    Calories / serving710 kcal
    A bowl of creamy chicken pasta glossed with sauce and flecked with black pepper, plated under cold light Plate 01 / Finished

    For years I thought a bulk meal had to be either delicious or sensible, never both. I’d choke down dry chicken and rice all week to keep my numbers clean, and then on a Friday I’d cave and eat a creamy pasta so heavy it sat in my chest till morning. One or the other. That was the deal I’d made with myself, and it was a bad deal.

    The fix came on a slow afternoon in my kitchen in Stockholm, when I had a tub of cottage cheese in the fridge and no cream, and I was too lazy to go out into the cold for it. So I blended the cottage cheese smooth, warmed it gently with a little pasta water and garlic, and folded it through the noodles with the chicken. It went silky. It clung to the pasta like a real cream sauce. And it carried about three times the protein of the thing I’d been hiding from.

    This is the bulk one, love — the version I cook when I want to grow and still want to enjoy my dinner like a person. It’s big, it’s warm, it’s properly creamy, and the macros do real work. I’ve fed it to lifters twice my appetite and watched them go quiet and happy. Cook it once on a cold night and I think it’ll earn a permanent spot in your week. I’ve got you.

    01Who it’s for & when to eat it

    This plate is built to add calories without making you miserable. The sauce and chicken stay the same; what you change is how much pasta sits underneath. Here’s how I steer it.

    On a bulk

    The default plate

    A full 100g of dry pasta per person, the whole sauce, plenty of chicken. This is easy, calorie-dense fuel that still lands over 50g of protein. My go-to on a heavy training day when the appetite is finally there.

    On a cut

    Pull it back

    Drop the pasta to 60g dry and swap in a pile of courgette ribbons for volume. Same creamy sauce, far fewer calories, still a lot of protein. See the variations below for the numbers.

    On TRT

    Steady portion

    A middle plate — 75g dry pasta, a normal serving of chicken, a handful of spinach stirred in. Balanced carbs and protein for a satisfying evening meal that won’t overshoot.

    Timing: this is a brilliant post-training dinner — the carbs help you recover and the protein does the building. It’s also one of the few pasta dishes that reheats genuinely well, so it pulls double duty as next-day lunch.

    02Ingredients

    Makes 2 big plates. The sauce is built on cottage cheese, so keep that the star — everything else scales around it. Want more? Multiply every line and keep the ratio.

    Servings 2 · adjust on the live recipe card
    • Chicken breast, diced300 g · 10.6 oz
    • Dried pasta penne or fusilli200 g · 7 oz
    • Cottage cheese full-fat or low-fat250 g · 8.8 oz
    • Garlic, grated3 cloves
    • Grated parmesan30 g · 1 oz
    • Olive oil1 tbsp · 15 ml
    • Reserved pasta water120 ml · ½ cup
    • Baby spinach2 handfuls · 60 g
    • Black pepperto taste
    • Saltto taste

    Swaps I actually use: blended low-fat cottage cheese shaves fat for a leaner plate; full-fat eats richer. No parmesan? A spoon of nutritional yeast or any hard cheese works for the savoury hit. Chicken thigh in place of breast eats juicier but adds fat — fine on a bulk. For a higher-protein noodle, reach for a chickpea or lentil pasta; it changes the flavour a little but pushes the protein up.

    03Step by step

    The pasta

    Get the water on first

    Bring a big pot of salted water to the boil and cook the pasta to just shy of the packet time — you want it with a little bite, because it’ll finish in the sauce. Before you drain, scoop out a mug of the starchy water. That water is the secret to a silky sauce, so don’t tip it all away.

    Magnus says: reserve more pasta water than you think you need. You can always leave it; you can’t get it back.

    Pasta boiling in a pot of salted water with a mug of starchy water reserved beside it
    Blend the sauce base

    Cottage cheese, smooth as cream

    While the pasta cooks, blitz the cottage cheese in a blender or with a stick blender until it’s completely smooth — no curds left. This is what turns a lumpy tub into a glossy cream sauce. Set it aside for now.

    Magnus says: don’t skip the blending. Smooth is the whole trick; lumpy cottage cheese stays lumpy in the pan.

    Cottage cheese being blended smooth in a jug until it looks like cream
    Cook the chicken

    Sear it golden in one layer

    Heat the olive oil in a wide pan over a medium-high heat. Season the diced chicken and lay it in one layer so it browns rather than steams. Leave it alone for a couple of minutes, then turn and cook through. Pull it out onto a plate.

    Diced chicken searing golden in a wide pan in a single layer
    Build the sauce

    Garlic, then the blended cheese

    Lower the heat. Add the grated garlic to the same pan and stir for thirty seconds until it smells sweet — don’t let it brown. Pour in the blended cottage cheese and a splash of the reserved pasta water, then stir in the parmesan. Warm it gently; keep it on a low heat so it stays creamy and doesn’t split.

    Magnus says: low and slow with the sauce. Boil it hard and the cheese can turn grainy.

    A creamy pale sauce coming together in the pan with garlic and parmesan
    Bring it together

    Pasta, chicken, spinach, toss

    Add the drained pasta, the chicken and the spinach to the pan. Toss everything through the sauce, loosening with more pasta water a splash at a time until it coats every piece. The spinach will wilt in under a minute. Taste and season.

    Pasta, chicken and wilting spinach tossed through the creamy sauce in the pan
    Serve

    Plate it hot, crack of pepper on top

    Divide between two warm bowls, grate a little more parmesan over if you like, and finish with a generous crack of black pepper. Eat it straight away while the sauce is glossy and loose.

    Magnus says: it thickens as it sits, so serve it slightly looser than you think. A splash of water revives leftovers too.

    The finished creamy chicken pasta plated in a warm bowl with pepper and parmesan

    04The spec sheet

    Real numbers, calculated — not guessed. The recipe makes 2 plates, about 700g of finished food total. Here’s what one serving (~350g) and a flat 100g actually give you.

    Macros — per serving & per 100g
    NutrientPer servingPer 100g
    Energy710 kcal203 kcal
    Protein53.0 g15.1 g
    Carbohydrate78.0 g22.3 g
    — of which sugars5.0 g1.4 g
    Fat18.0 g5.1 g
    — of which saturates6.5 g1.9 g
    Fibre4.5 g1.3 g
    Sodium~0.62 g~0.18 g
    Calorie density
    203 kcal / 100g

    Moderate. High enough to make hitting a surplus easy, but not so dense you can’t finish a satisfying bowl — exactly what you want when you’re trying to grow without forcing food.

    Protein per 100 kcal
    7.5 g / 100 kcal

    Strong for a creamy pasta. The cottage-cheese sauce is doing the heavy lifting here — it turns a carb-heavy plate into a genuinely high-protein meal.

    Key micros (per serving, approx.)
    • Calcium~280 mg · 28% DV
    • Selenium~52 µg · 95% DV
    • Niacin (B3)~16 mg · 100% DV
    • Phosphorus~480 mg · 69% DV
    • Vitamin B12~1.4 µg · 58% DV
    • Folate~95 µg · 24% DV

    Macros are calculated from standard food-composition data and will shift a little with your exact ingredients and brands. Micronutrient figures are estimates against general adult Daily Values. Numbers are for guidance, not medical advice — see our Nutrition Disclaimer.

    05Bulk / Cut / TRT variations

    One sauce, three jobs. The creamy base and chicken stay the same — you move the pasta up or down and add or drop volume. Macros below are for a full serving.

    Bulk

    The full plate

    The recipe as written — 100g dry pasta per person, the whole sauce, plenty of chicken. Add a second drizzle of olive oil if you need the calories higher still. Easy, comforting fuel for growing.

    710Kcal
    53G Protein
    18G Fat
    Cut

    Lighter & loaded with veg

    Drop the pasta to 60g dry and bulk the bowl out with courgette ribbons or extra spinach. Use low-fat cottage cheese. You keep the creamy comfort and most of the protein for far fewer calories.

    470Kcal
    48G Protein
    10G Fat
    TRT

    Steady & balanced

    A middle plate — 75g dry pasta, a normal portion of chicken, spinach stirred through. Balanced carbs and protein that fill you up for an evening meal without pushing the calories too high.

    590Kcal
    50G Protein
    14G Fat

    06Meal prep & storage

    This is one of the rare creamy pastas that genuinely reheats well, because the cottage-cheese sauce doesn’t break the way a flour-and-cream one does. I batch it for two or three days at a time.

    Fridge
    3 days

    Store in an airtight container once cooled. The sauce tightens as it chills — that’s normal, it loosens back up on reheat.

    Freezer
    2 months

    Freezes acceptably, though the texture is best fresh. Thaw overnight in the fridge before reheating gently.

    Reheat
    5 min

    Reheat in a pan over low heat with a good splash of water or milk, stirring until the sauce goes creamy again. Microwave works too — add liquid first.

    For meal prep, I portion it into boxes the moment it’s cooled and always tuck a little splash of water in to add when I reheat. That one move is the difference between a creamy lunch and a dry one on day three.

    Free · the 7-day “Get Fed” plan

    Want a whole week built around food like this?

    Drop your email and I’ll send you my free 7-day plan — meals, macros already counted, grocery list written. No spam, no lectures.

    No spam. Unsubscribe whenever. See what’s in the plan →

    07Common questions

    Won’t the cottage cheese taste sour? +

    Once it’s blended smooth and warmed with garlic and parmesan, the tang mellows right out — most people can’t tell it isn’t cream. If you’re sensitive to it, use a milder full-fat cottage cheese and lean on the parmesan and pepper. It reads as a savoury, creamy sauce, not a sour one.

    My sauce went grainy — what happened? +

    Two usual culprits: the cheese wasn’t blended smooth to start with, or the pan got too hot and the sauce boiled. Keep the heat low once the cheese goes in, and always blitz it first. If it has split a little, a splash of cold pasta water and a brisk stir off the heat usually brings it back.

    Can I make this higher protein still? +

    Yes. Swap the regular pasta for a chickpea or lentil one and you’ll add roughly 10–15g of protein per serving, plus more fibre. You can also stir an extra 50g of blended cottage cheese into the sauce. Both keep the creamy texture and push the numbers up.

    What pasta shape works best? +

    Anything with ridges or hollows that grab the sauce — penne, fusilli, rigatoni. Long pasta like spaghetti works too but holds less sauce per bite. Cook it just shy of done so it finishes in the pan and soaks up flavour.

    Can I use leftover or rotisserie chicken? +

    Absolutely — it makes this a ten-minute meal. Skip the searing step, build the sauce, and fold the shredded cooked chicken in at the end just to warm through. The macros land in the same ballpark depending on the cut you use.

    From my 7-day Bulk plan

    This pasta lives inside a full week of meals.

    This creamy chicken pasta is one plate in my 7-day bulking plan — seven days of high-protein, calorie-dense meals with the macros counted and the grocery list written. You pick the goal; I do the maths.

    See the bulking meal plan
    A creamy chicken pasta plate from the 7-day bulking meal plan under cold light

    08Pairs well with

    Browse all recipes →

    Magnus Olafsson in his kitchen — bald, bearded and broad, in his pink apron, under cold light
    About the author

    Magnus Olafsson

    I’m Magnus — twenty years under the iron, from a cold gym in Stockholm to the classic-physique stage, and now mostly in my kitchen in a pink apron. I’ve cut for shows, bulked through winters, and I’ve been on TRT since I was thirty-five. I know what it takes to eat for the body you’re chasing, and I know it shouldn’t come with a side of shame.

    Everything here is food I actually cook and macros I actually count. I don’t diagnose, I don’t promise, and I never make a number up. I just feed you well and tell you the truth.

    NPC Illinois NPC Classic Physique On TRT since 35 20 years training

    Slim Diet Era shares recipes and general nutrition information. It is not medical or dietetic advice, and we do not provide guidance on obtaining or using any controlled substance. See our Medical Disclaimer and Nutrition Disclaimer.
  • High-Protein Beef Lasagna

    High-Protein Beef Lasagna

    Recipe · Bulking / Beef / High-protein

    High-Protein Beef Lasagna

    A proper beef lasagna rebuilt to land big protein — about 54 grams of protein and 690 honest calories a slice. The comfort-food classic, layered with a rich meat sauce and a protein-packed cheese layer. Sunday dinner that actually feeds the work you put in.

    GoalBulk
    Total time70 min
    Servings4 slices
    Protein / serving54 g
    Calories / serving690 kcal
    A slice of high-protein beef lasagna with rich meat sauce and a golden cheese top, plated under cold light Plate 01 / Finished

    Lasagna was always the dinner I made when people came over — big, generous, the kind of thing you carry to the table whole and let everyone fall on. The trouble was, the classic version is heavy on pasta and béchamel and light on protein, and once I was training seriously it didn’t fit. So I spent a good few rainy Sundays rebuilding it: more meat in the sauce, a lighter cottage-cheese-and-ricotta layer doing the job of the béchamel, and the protein lifted from “a bit” to a serious 54 grams a slice. It still feeds a table, and now it feeds the work too.

    This is comfort food in the truest sense — slow to build, worth every minute, and the kind of thing that makes a house smell like Sunday. The meat sauce is where the love goes: browned hard, simmered low, left to deepen. The cheese layer is creamy and rich but carries real protein instead of just fat. About 690 honest calories a slice, and it gets better every day it sits in the fridge. For a bulk, a tray of this is several meals of genuine pleasure already handled.

    I won’t pretend it’s a quick midweek throw-together — it’s not, and that’s fine. Some food is meant to be made slowly on a quiet afternoon, and this is one of them. Put some music on, take your time with the sauce, and you’ll end up with a tray that feeds you for days and tastes like someone cared. Make it once and it’ll become your Sunday tradition too. I’ve got you on this one.

    01Who it’s for & when to eat it

    This is a hearty, high-protein bake that flexes to your goal. The meat sauce stays rich; you move the pasta layers, the cheese, and the cut of beef. Here’s how I steer it.

    On a bulk

    The default slice

    Full pasta layers, a generous cheese top, and the rich meat sauce. Calorie-dense and deeply comforting — the Sunday bake that feeds the whole week’s training when you’re building.

    On a cut

    Lighten the layers

    Swap some pasta sheets for thin courgette slices, use 5% beef, and lean on cottage cheese over mozzarella. You keep the comfort and protein for far fewer calories. See the variations below.

    On TRT

    Steady fuel

    A moderate slice with plenty of salad on the side. Balanced protein, carbs and fats that keep you full and recovering without overshooting the day. A satisfying, sturdy main meal.

    Timing: a hearty evening or post-training meal — protein and carbs in one comforting slice. It’s at its best as a make-ahead Sunday bake that you portion out for the days that follow.

    02Ingredients

    Makes 4 slices from one tray. Doubling for a bigger crowd? Use a larger dish and add 10 minutes to the bake.

    Servings 4 · adjust on the live recipe card
    • Lean beef mince 5% fat600 g · 21 oz
    • Lasagna sheets9 sheets · ~180 g
    • Passata / chopped tomatoes700 g · 24.7 oz
    • Cottage cheese300 g · 10.6 oz
    • Ricotta150 g · 5.3 oz
    • Grated mozzarella120 g · 4.2 oz
    • Onion + garlic1 onion, 3 cloves
    • Egg binds the cheese layer1 large
    • Olive oil1 tbsp · 15 ml
    • Italian herbs, salt & pepperto taste

    Swaps I actually use: for a cut, replace a layer of pasta sheets with thin courgette ribbons and lean harder on the cottage cheese — drops the carbs and calories noticeably. No ricotta? Use all cottage cheese, blended smooth, for an even leaner, higher-protein layer. Turkey mince swaps straight in for beef. Make your own passata-based sauce to keep the sodium in check.

    03Step by step

    Brown the beef

    Sear it hard for deep flavour

    Heat the oil in a large pan over high. Add the beef, press it flat, and let it brown properly before breaking it up. Real colour on the meat is where the depth of the sauce comes from — don’t rush this bit.

    Magnus says: a grey, steamed mince makes a flat sauce. Get a proper sear on it first.

    Lean beef mince browning in a large pan
    Build the sauce

    Onion, garlic, tomato, then simmer

    Add the diced onion and soften, then the garlic for thirty seconds. Pour in the passata, season with herbs, salt and pepper, and simmer gently for 20 to 25 minutes until rich and thick. A low, slow simmer is what makes it taste like more than the sum of its parts.

    The meat sauce simmering with tomato, onion and herbs
    Mix the cheese layer

    Cottage cheese, ricotta, egg

    In a bowl, stir the cottage cheese, ricotta, egg and a little salt and pepper together. The egg sets the layer as it bakes so it slices cleanly instead of sliding out. This is your high-protein stand-in for the heavy béchamel.

    Magnus says: blend the cottage cheese smooth first if you want a silkier layer — texture’s a personal thing.

    Cottage cheese, ricotta and egg mixed in a bowl
    Layer it up

    Sauce, pasta, cheese, repeat

    Heat the oven to 190°C (375°F). Spread a little sauce in the dish, then layer pasta sheets, meat sauce and cheese mix, repeating until you finish with sauce on top. Don’t overfill each layer — even, thin layers cook through evenly.

    The lasagna being layered with pasta, meat sauce and cheese
    Top & bake

    Mozzarella on, into the oven

    Scatter the mozzarella over the top and bake for 30 to 35 minutes, until the pasta is tender and the top is golden and bubbling. Cover with foil for the first 20 minutes if it’s browning too fast, then uncover to finish.

    The lasagna baking with a golden, bubbling cheese top
    Rest & slice

    Let it settle before cutting

    This is the hard part — let it rest 10 minutes out of the oven before you cut it. Slicing too soon and it slumps into a heap. A proper rest lets it set so you get clean, sturdy slices. Then portion into four and serve.

    Magnus says: I know it smells incredible. Wait the ten minutes — your slices will thank you for it.

    A clean slice of the finished lasagna lifted from the tray

    04The spec sheet

    Real numbers, calculated — not guessed. The recipe makes 4 slices, around 1700g of baked lasagna total. Here’s what one slice (about 425g) and a flat 100g actually give you.

    Macros — per serving & per 100g
    NutrientPer servingPer 100g
    Energy690 kcal162 kcal
    Protein54.0 g12.7 g
    Carbohydrate52.0 g12.2 g
    — of which sugars10.0 g2.4 g
    Fat26.0 g6.1 g
    — of which saturates11.0 g2.6 g
    Fibre5.0 g1.2 g
    Sodium~0.8 g~0.19 g
    Calorie density
    162 kcal / 100g

    Moderate-high, carried by the beef and cheese. On a build that’s the point — a generous, comforting slice that delivers real calories without an enormous portion.

    Protein per 100 kcal
    7.8 g / 100 kcal

    A lifter’s metric. Genuinely high for a lasagna — the lean beef and the cottage-cheese layer together turn a comfort classic into a serious protein meal.

    Key micros (per serving, approx.)
    • Vitamin B12~4.5 µg · 188% DV
    • Calcium~400 mg · 31% DV
    • Zinc~10 mg · 91% DV
    • Iron~5 mg · 28% DV
    • Selenium~35 µg · 64% DV
    • Phosphorus~500 mg · 71% DV

    Macros are calculated from standard food-composition data and will shift a little with your exact ingredients and brands. Micronutrient figures are estimates against general adult Daily Values. Numbers are for guidance, not medical advice — see our Nutrition Disclaimer.

    05Bulk / Cut / TRT variations

    One bake, three jobs. The meat sauce holds steady; you move the pasta, the cheese, and the beef. Macros below are for a full serving (one slice as built).

    Bulk

    Build it up

    Full pasta layers, a generous mozzarella top, a drizzle of olive oil over the sauce, and a slice of garlic bread on the side. Rich, calorie-dense comfort food to fuel a serious build.

    870Kcal
    57G Protein
    36G Fat
    Cut

    The lean version

    Swap a pasta layer for thin courgette ribbons, use all blended cottage cheese instead of ricotta, and cut the mozzarella top in half. Keeps the comfort and the high protein, drops the calories.

    460Kcal
    50G Protein
    14G Fat
    TRT

    Steady & balanced

    A standard slice with a big side salad dressed in olive oil and lemon. Balanced protein, carbs and good fats that keep you full and recovering without overshooting the day.

    620Kcal
    54G Protein
    26G Fat

    06Meal prep & storage

    Lasagna might be the best meal-prep dish there is — it improves overnight and reheats like a dream. One tray on a Sunday is four genuinely good meals through the week, no extra cooking.

    Fridge
    4 days

    Portion into slices once cooled and box them up. The flavour deepens as it sits, so day two and three are arguably better than the day you baked it.

    Freezer
    3 months

    Freezes beautifully, whole or in slices. Cool fully, wrap well, and thaw overnight in the fridge before reheating. Brilliant to have a slice in reserve.

    Reheat
    12 min

    Oven at 180°C, covered, for 12–15 minutes keeps it moist and re-crisps the top. The microwave works for a single slice in a hurry — cover it and add a splash of water.

    My move: bake the tray on a quiet afternoon, let it cool, then slice and box it. Four meals of proper comfort food done in one go — exactly the kind of make-ahead that makes eating for a build feel easy instead of relentless.

    Free · the 7-day “Get Fed” plan

    Want a whole week built around food like this?

    Drop your email and I’ll send you my free 7-day plan — meals, macros already counted, grocery list written. No spam, no lectures.

    No spam. Unsubscribe whenever. See what’s in the plan →

    07Common questions

    Do I need to pre-cook the lasagna sheets? +

    Not if you use a generous, slightly loose sauce — the sheets cook in the moisture as it bakes, which is how most no-boil sheets are designed to work. If your sauce is very thick or you’re using traditional dry sheets, a quick par-boil or an extra splash of liquid in the layers keeps them from staying hard.

    Why does cottage cheese instead of béchamel? +

    Béchamel is mostly butter, flour and milk — lots of calories, very little protein. Cottage cheese (with a little ricotta and an egg to bind) gives you that same creamy layer with a big protein boost and far less fat. It’s the single change that turns a lasagna into a high-protein meal.

    How do I make it lower-carb? +

    Replace one or more pasta layers with thin ribbons of courgette or aubergine — salt them and pat dry first so they don’t water down the bake. You’ll drop the carbs noticeably while keeping all that comforting, layered structure. See the Cut variation above.

    Can I use turkey or chicken mince? +

    Absolutely. Turkey or chicken mince both work and come out leaner. Brown them well and lean a little harder on the herbs and garlic, since they bring less of their own richness than beef. The protein stays high; the fat and calories drop a touch.

    Why did my lasagna fall apart when I cut it? +

    It didn’t rest long enough. Straight from the oven it’s molten and won’t hold a slice. Give it a full 10 minutes to settle and the egg-set cheese layer firms up, so it cuts into clean, sturdy pieces. Patience is the only trick here.

    From my 7-day Bulk plan

    This bake lives inside a full week of meals.

    This lasagna is one dinner in my 7-day bulking plan — seven days of high-protein, calorie-dense meals with the macros counted and the grocery list written. You pick the goal; I do the maths.

    See the bulking meal plan
    The 7-day bulking meal plan laid out as portioned meals under cold light

    08Pairs well with

    Browse all recipes →

    Magnus Olafsson in his kitchen — bald, bearded and broad, in his pink apron, under cold light
    About the author

    Magnus Olafsson

    I’m Magnus — twenty years under the iron, from a cold gym in Stockholm to the classic-physique stage, and now mostly in my kitchen in a pink apron. I’ve cut for shows, bulked through winters, and I’ve been on TRT since I was thirty-five. I know what it takes to eat for the body you’re chasing, and I know it shouldn’t come with a side of shame.

    Everything here is food I actually cook and macros I actually count. I don’t diagnose, I don’t promise, and I never make a number up. I just feed you well and tell you the truth.

    NPC Illinois NPC Classic Physique On TRT since 35 20 years training

    Slim Diet Era shares recipes and general nutrition information. It is not medical or dietetic advice, and we do not provide guidance on obtaining or using any controlled substance. See our Medical Disclaimer and Nutrition Disclaimer.
  • Mass-Gainer Overnight Oats

    Mass-Gainer Overnight Oats

    Recipe · Bulking / Breakfast / High-protein

    Mass-Gainer Overnight Oats

    A jar of creamy overnight oats built to put size on you gently — about 45 grams of protein and 720 honest calories. Make it tonight, eat it tomorrow, and start the day already well fed. Real food doing the job most powders pretend to.

    GoalBulk
    Total time5 min + chill
    Servings1 jar
    Protein / serving45 g
    Calories / serving720 kcal
    A jar of creamy overnight oats layered with banana, peanut butter and crushed nuts, under cold light Plate 01 / Finished

    Most shop-bought mass gainers are, to be blunt, a tub of cheap maltodextrin and a pinch of protein for a silly price. I used them in my twenties because I didn’t know better, and they sat in my gut like cement. When I started actually understanding food, I worked out you can build the same thing — high calories, decent protein — out of oats, milk, peanut butter and a banana, for a fraction of the cost and a fraction of the bloat. This jar is the result, and I’ve made it more times than I can count.

    The whole point is ease. You stir it together at night while you’re cleaning up after dinner, leave it in the fridge, and in the morning it’s ready — thick, creamy, no cooking, no thinking. About 720 honest calories and 45 grams of protein waiting for you before you’ve even opened your eyes properly. On a build, when getting enough food in is half the challenge, having breakfast already done is worth more than any supplement. It’s a quiet, sturdy workhorse of a meal.

    I’m not going to promise you it’ll “transform” anything, because nothing in a jar does that — the work happens in the gym and over months, not mornings. What this does is make eating enough genuinely easy, and it does it with real food you can pronounce. Make a couple of jars on a Sunday and your bulking breakfasts are handled for half the week. No fuss, no powder-shaker rinse, just good oats waiting for you. I’ve got you on this one.

    01Who it’s for & when to eat it

    This is a make-ahead, high-protein breakfast that flexes to your goal. The oat-and-protein base stays the same; you move the peanut butter, the oats, and the toppings. Here’s how I steer it.

    On a bulk

    The default jar

    Full oats, a generous spoon of peanut butter, protein, banana and crushed nuts. Calorie-dense and effortless — the jar I lean on hardest when I’m trying to put size on without skipping meals.

    On a cut

    Lighten it

    Drop the oats, swap peanut butter for powdered peanut, use skimmed milk and lean on the protein and berries. You keep the convenience and the protein for far fewer calories. See the variations below.

    On TRT

    Steady fuel

    A moderate oat portion with full protein and a sensible spoon of peanut butter. Balanced carbs, fats and protein to keep you full through the morning without overshooting the day.

    Timing: a grab-and-go breakfast, built the night before — slow carbs to carry you to lunch and protein to start the day strong. It also works as a sturdy snack between meals when you’re chasing calories on a build.

    02Ingredients

    Makes 1 jar. Easy to batch — make four or five jars at once and your week’s breakfasts are sorted.

    Servings 1 · adjust on the live recipe card
    • Rolled oats70 g · 3/4 cup
    • Milk or plant milk200 ml · 3/4 cup
    • Greek yoghurt100 g · 3.5 oz
    • Whey protein vanilla30 g · 1 scoop
    • Peanut butter20 g · 1 tbsp
    • Banana, mashed + sliced1 medium
    • Chia seeds1 tbsp · 12 g
    • Honey optional1 tsp · 7 g
    • Crushed nuts to top15 g · 1/2 oz
    • Cinnamon & pinch of saltto taste

    Swaps I actually use: for a cut, swap peanut butter for powdered peanut, use skimmed milk and fat-free yoghurt, and drop the nuts. No whey? Casein makes it even thicker overnight, or use a plant protein. The chia is optional but it thickens the jar lovely and adds a little fibre and fat. Berries instead of banana lower the sugar.

    03Step by step

    Mix the wet

    Milk, yoghurt, protein into the jar

    In a jar or tub, stir the milk, Greek yoghurt and protein powder together until smooth. Get the protein fully dissolved now — it’s far easier while it’s loose than once the oats go in and thicken it up.

    Magnus says: a fork beats a spoon for breaking up protein lumps. Beat it properly smooth first.

    Milk, yoghurt and protein stirred smooth in a jar
    Add the banana

    Mash half, slice half

    Mash half the banana and stir it through the wet mix for natural sweetness and creaminess. Keep the other half sliced to layer in and top with — it stops the jar tasting one-note and gives you something to bite.

    Mashed banana stirred into the wet mix
    Stir in the dry

    Oats, chia, cinnamon, salt

    Add the oats, chia seeds, cinnamon and a pinch of salt and stir well so everything is evenly coated and submerged. The chia needs to be mixed through, not clumped, so it gels evenly as it sits overnight.

    Oats and chia stirred into the jar
    Swirl the PB

    Peanut butter and honey through

    Drop in the peanut butter and the honey if using, and swirl them through — they don’t need to fully blend, those ribbons of peanut butter are part of the pleasure. Give it one last gentle stir to bring it together.

    Peanut butter swirled through the oat mixture
    Chill overnight

    Lid on, into the fridge

    Seal the jar and refrigerate for at least 4 hours, ideally overnight. The oats and chia drink up the liquid and go thick and creamy while you sleep. No cooking, no effort — the fridge does all the work for you.

    Magnus says: if it’s too thick in the morning, a splash of milk loosens it right back. Too thin? It wasn’t long enough — give it more time next batch.

    The sealed jar chilling in the fridge
    Top & eat

    Sliced banana, nuts, dig in

    In the morning, give it a stir, top with the reserved banana slices and crushed nuts, and eat it cold straight from the jar. Already done, already counted — a proper bulking breakfast with zero morning effort.

    The finished jar topped with banana slices and crushed nuts

    04The spec sheet

    Real numbers, calculated — not guessed. The recipe makes 1 jar, around 520g of finished oats with toppings. Here’s what the full jar and a flat 100g actually give you.

    Macros — per serving & per 100g
    NutrientPer servingPer 100g
    Energy720 kcal138 kcal
    Protein45.0 g8.7 g
    Carbohydrate82.0 g15.8 g
    — of which sugars30.0 g5.8 g
    Fat22.0 g4.2 g
    — of which saturates5.0 g1.0 g
    Fibre11.0 g2.1 g
    Sodium~0.3 g~0.06 g
    Calorie density
    138 kcal / 100g

    Moderate, and very easy to eat — cold, creamy oats go down without a fight. On a build that’s exactly what you want from a breakfast that has to carry real calories.

    Protein per 100 kcal
    6.3 g / 100 kcal

    A lifter’s metric. Strong for a make-ahead carb breakfast — the whey and Greek yoghurt together push a humble jar of oats into proper-meal territory.

    Key micros (per serving, approx.)
    • Calcium~400 mg · 31% DV
    • Magnesium~160 mg · 38% DV
    • Phosphorus~500 mg · 71% DV
    • Potassium~950 mg · 20% DV
    • Vitamin B12~1.5 µg · 63% DV
    • Zinc~3.5 mg · 32% DV

    Macros are calculated from standard food-composition data and will shift a little with your exact ingredients and brands. Micronutrient figures are estimates against general adult Daily Values. Numbers are for guidance, not medical advice — see our Nutrition Disclaimer.

    05Bulk / Cut / TRT variations

    One jar, three jobs. The oat-and-protein base holds; you move the peanut butter, the milk, and the toppings. Macros below are for a full serving (one jar built as described).

    Bulk

    Build it up

    90g oats, a heaped spoon of peanut butter, full protein, whole milk, banana, honey and a generous handful of crushed nuts. Effortless, calorie-dense morning fuel for a serious build.

    900Kcal
    48G Protein
    32G Fat
    Cut

    The lean version

    45g oats, powdered peanut instead of the spoonful, skimmed milk, fat-free yoghurt, berries instead of banana, no nuts. Keeps the protein and the convenience, drops the calories right down.

    360Kcal
    40G Protein
    6G Fat
    TRT

    Steady & balanced

    65g oats, a sensible spoon of peanut butter, full protein, banana and a few nuts. Balanced carbs, fats and protein to keep you full through the morning without tipping the day over.

    620Kcal
    45G Protein
    18G Fat

    06Meal prep & storage

    Overnight oats are practically built for meal prep — the whole recipe is “make ahead.” Line up a few jars on a Sunday and your bulking breakfasts run themselves all week.

    Fridge
    4 days

    Made jars keep four days sealed. Add fresh banana and the nuts on the morning you eat each one so the toppings stay crisp and bright.

    Freezer
    1 month

    You can freeze them, though the texture softens. Thaw overnight in the fridge and stir well. Honestly, fresh jars through the week are the better move.

    Loosen
    30 sec

    If a jar’s gone very thick after a few days, stir in a splash of milk to bring it back to a creamy, spoonable texture. No reheating needed — eat it cold.

    My move: five jars on a Sunday night, fifteen minutes of work, and breakfast is handled till Friday. On a build, taking the morning decision off the table is one of the kindest things you can do for yourself.

    Free · the 7-day “Get Fed” plan

    Want a whole week built around food like this?

    Drop your email and I’ll send you my free 7-day plan — meals, macros already counted, grocery list written. No spam, no lectures.

    No spam. Unsubscribe whenever. See what’s in the plan →

    07Common questions

    How is this better than a shop-bought mass gainer? +

    It’s real food, far cheaper, and far easier on your gut. Most gainers are mostly cheap sugar with a little protein. This jar hits similar calories and a solid 45g of protein from oats, milk, yoghurt and peanut butter — things you can actually pronounce, and that fill you up instead of bloating you.

    Can I eat it warm? +

    You can — give it a short, gentle warm in the microwave with a splash of milk. But honestly the magic here is no cooking; it’s designed to be eaten cold and creamy straight from the fridge. If you want hot oats, my stovetop peanut-butter protein oats are the better recipe.

    Why are my oats too thick / too runny? +

    Too thick means the oats and chia drank all the liquid — just stir in a splash of milk. Too runny usually means not enough chill time or too much liquid; give it the full overnight, and next batch add a touch less milk or a little more chia to firm it up.

    Can I leave out the chia seeds? +

    Yes — the oats will thicken fine on their own, just a little less so. Chia adds a thicker, puddingy texture plus some fibre and good fat. If you skip it, you might reduce the milk slightly so the jar still sets thick overnight.

    Is it fine to make several days ahead? +

    Up to about four days, yes — that’s the whole appeal. Keep the jars sealed and add the fresh banana and nuts each morning rather than at the start, so the toppings don’t go soft or brown sitting in the fridge.

    From my 7-day Bulk plan

    This breakfast lives inside a full week of meals.

    These oats are one breakfast in my 7-day bulking plan — seven days of high-protein, calorie-dense meals with the macros counted and the grocery list written. You pick the goal; I do the maths.

    See the bulking meal plan
    The 7-day bulking meal plan laid out as portioned meals under cold light

    08Pairs well with

    Browse all recipes →

    Magnus Olafsson in his kitchen — bald, bearded and broad, in his pink apron, under cold light
    About the author

    Magnus Olafsson

    I’m Magnus — twenty years under the iron, from a cold gym in Stockholm to the classic-physique stage, and now mostly in my kitchen in a pink apron. I’ve cut for shows, bulked through winters, and I’ve been on TRT since I was thirty-five. I know what it takes to eat for the body you’re chasing, and I know it shouldn’t come with a side of shame.

    Everything here is food I actually cook and macros I actually count. I don’t diagnose, I don’t promise, and I never make a number up. I just feed you well and tell you the truth.

    NPC Illinois NPC Classic Physique On TRT since 35 20 years training

    Slim Diet Era shares recipes and general nutrition information. It is not medical or dietetic advice, and we do not provide guidance on obtaining or using any controlled substance. See our Medical Disclaimer and Nutrition Disclaimer.
  • Seared Steak and Roasted Potatoes

    Seared Steak and Roasted Potatoes

    Recipe · Bulking / Beef / High-protein

    Seared Steak and Roasted Potatoes

    A proper seared steak with crisp roasted potatoes and greens — about 52 grams of protein and 760 honest calories. The dinner you’d order out, built to feed a building day. Big flavour, real carbs, nothing fancy and nothing missing.

    GoalBulk
    Total time45 min
    Servings1 plate
    Protein / serving52 g
    Calories / serving760 kcal
    A seared steak with crisp roasted potatoes and a pile of greens, plated under cold light Plate 01 / Finished

    This is the dinner I cook when I want to feel like I’m eating out without the bill or the guesswork. Steak and potatoes is a plate restaurants charge a fortune for, and most of the time you can do it better at home — a properly seared steak rested right, potatoes roasted crisp in a little of the beef fat, and a pile of greens to round it out. On a build it’s perfect: real protein, real carbs, and the kind of meal you actually look forward to all afternoon.

    I went through a phase early on of being scared of potatoes — convinced they’d undo my training, which is nonsense I picked up from the internet and wish I’d never believed. Potatoes are one of the most filling, satisfying carbs there is, and roasted properly they’re a thing of beauty. Here they give the plate around 760 honest calories and carry the steak beautifully. The greens add fibre and colour and stop it feeling like a slab of meat on a slab of starch. It’s balance, not restriction.

    This takes a bit longer than my weeknight bowls because the potatoes need real oven time to crisp — but most of that is hands-off, and the result is worth it. It’s a Friday-night plate, a feed-someone-you-love plate, a treat-yourself-after-a-hard-week plate. Learn to sear a steak and roast a potato and you’ve got dinner sorted for life. No rush — stand at the stove and I’ll walk you through it. I’ve got you on this one.

    01Who it’s for & when to eat it

    This is a hearty, high-protein plate that flexes to your goal. The steak stays the star; you move the potato portion, the fat, and the cut. Here’s how I steer it.

    On a bulk

    The default plate

    A generous steak, a full tray of crisp potatoes, greens on the side. Calorie-dense and deeply satisfying — my Friday-night dinner when I want to eat well and refill after a hard week.

    On a cut

    Trim it down

    Swap to a leaner sirloin, halve the potatoes, roast with minimal oil, and double the greens. You keep the steak-dinner feel for far fewer calories. See the variations below.

    On TRT

    Steady fuel

    A full steak, a moderate potato portion, and plenty of greens. Good fats, real carbs and high protein to keep you full and recovering without overshooting the day. A solid main any time.

    Timing: a post-training dinner at its best — protein to rebuild, potatoes to refill what you emptied. It’s also the weekend plate I make when I’ve got the time to do the steak and potatoes properly.

    02Ingredients

    Makes 1 plate. Doubling? Roast the potatoes on two trays so they don’t steam each other, and sear the steaks one at a time in a hot pan.

    Servings 1 · adjust on the live recipe card
    • Sirloin or rump steak220 g · 7.8 oz
    • Potatoes floury, e.g. Maris Piper300 g · 10.6 oz
    • Tenderstem broccoli or greens120 g · 4.2 oz
    • Olive oil1 tbsp · 15 ml
    • Garlic, crushed2 cloves
    • Rosemary optional1 sprig
    • Butter to baste1 tsp · 5 g
    • Sea saltto taste
    • Black pepperto taste

    Swaps I actually use: for a hard bulk, step up to a fattier ribeye and add an extra knob of butter to baste — easy clean calories. On a cut, stick with lean sirloin, roast the potatoes in a teaspoon of oil instead of a tablespoon, and load the greens. No floury potatoes? New potatoes roast lovely and crisp too; just cut them small.

    03Step by step

    Parboil the potatoes

    A quick boil for crisp edges

    Heat the oven to 210°C (410°F). Cut the potatoes into even chunks and boil them for 8 minutes until just tender at the edges, then drain and let them steam-dry in the colander for a minute. This is the secret to crisp roast potatoes.

    Magnus says: rough up the edges in the colander after draining — those fluffy bits go gloriously crisp.

    Potato chunks parboiled and steam-drying in a colander
    Roast them

    Hot tray, plenty of space

    Toss the potatoes with most of the oil, salt and pepper and spread them on a hot tray with space between each. Roast 30 to 35 minutes, turning once, until deep golden and crisp. Crowd them and they steam instead of crisping.

    Potatoes roasting golden and crisp on a tray
    Temper the steak

    Out of the fridge, dry and seasoned

    While the potatoes roast, take the steak out to lose its chill. Pat it bone-dry and season both sides well with salt and pepper. A dry, room-temperature steak sears far better than a cold, damp one.

    Magnus says: dry the steak like you mean it. Moisture is the enemy of a good crust.

    A steak patted dry and seasoned on a board
    Sear the steak

    Smoking pan, leave it alone

    Heat a heavy pan until it just smokes. Lay the steak in away from you and leave it two to three minutes until a deep crust forms, then flip. Add the butter, garlic and rosemary and spoon the foaming butter over for a minute.

    A steak searing in a hot pan with butter, garlic and rosemary
    Rest & cook the greens

    Let the steak settle

    Lift the steak onto a board and rest it five minutes — non-negotiable for a juicy steak. While it rests, steam or quickly fry the greens until tender with a bit of bite, seasoned with a little salt and pepper.

    Magnus says: resting keeps the juices in the meat instead of on your board. Five minutes, every time.

    The steak resting on a board beside a pan of greens
    Plate

    Slice the steak, build the plate

    Slice the steak across the grain, lay it out with the crisp potatoes and greens, and spoon any resting juices over the top. A final pinch of salt and dinner’s done — the plate you’d order out, made better at home.

    The finished plate of sliced steak with roasted potatoes and greens

    04The spec sheet

    Real numbers, calculated — not guessed. The recipe makes 1 plate, around 560g of cooked food total. Here’s what the full plate and a flat 100g actually give you.

    Macros — per serving & per 100g
    NutrientPer servingPer 100g
    Energy760 kcal136 kcal
    Protein52.0 g9.3 g
    Carbohydrate58.0 g10.4 g
    — of which sugars3.5 g0.6 g
    Fat32.0 g5.7 g
    — of which saturates11.0 g2.0 g
    Fibre7.0 g1.3 g
    Sodium~0.5 g~0.09 g
    Calorie density
    136 kcal / 100g

    Moderate, helped by the greens bulking the plate. On a build that means real calories from a satisfying dinner without it feeling like an impossible mountain of food.

    Protein per 100 kcal
    6.8 g / 100 kcal

    A lifter’s metric. Solid for a hearty steak-and-potato plate — the lean steak keeps the protein density up even with the roast potatoes carrying the carbs.

    Key micros (per serving, approx.)
    • Vitamin B12~4 µg · 167% DV
    • Zinc~9 mg · 82% DV
    • Vitamin C~70 mg · 78% DV
    • Potassium~1500 mg · 32% DV
    • Iron~4.5 mg · 25% DV
    • Vitamin B6~1.1 mg · 65% DV

    Macros are calculated from standard food-composition data and will shift a little with your exact ingredients and brands. Micronutrient figures are estimates against general adult Daily Values. Numbers are for guidance, not medical advice — see our Nutrition Disclaimer.

    05Bulk / Cut / TRT variations

    One plate, three jobs. The steak does the heavy lifting; you move the cut, the potatoes, and the fat. Macros below are for a full serving (one plate built as described).

    Bulk

    Build it up

    Step up to a ribeye, a full tray of potatoes roasted in a generous tablespoon of oil, and an extra knob of butter basted over the steak. Rich, calorie-dense, and a proper reward of a plate.

    920Kcal
    55G Protein
    48G Fat
    Cut

    The lean version

    Lean sirloin, potatoes halved and roasted in a teaspoon of oil, greens doubled, no butter baste. Keeps all the steak-dinner feel and protein while the calories come right down.

    500Kcal
    50G Protein
    16G Fat
    TRT

    Steady & balanced

    A full lean steak, a moderate potato portion, plenty of greens with a little olive oil. Real carbs, high protein and good fats to keep you full and recovering without overshooting.

    680Kcal
    52G Protein
    26G Fat

    06Meal prep & storage

    Steak is best fresh, but the potatoes and greens prep well, and cooked steak keeps a couple of days. Here’s how I handle leftovers without ruining a good piece of meat.

    Fridge
    3 days

    Box the sliced steak separately from the potatoes. Slice the steak after resting so it reheats quickly and stays tender, or eat it cold the next day.

    Freezer
    2 months

    Roasted potatoes freeze and re-crisp well in a hot oven. I freeze cooked steak only when I must — thaw in the fridge and reheat gently.

    Reheat
    10 min

    Re-crisp the potatoes in a hot oven for 8–10 minutes; warm the steak fast and low so it doesn’t toughen. Or slice the cold steak over the hot potatoes — honestly lovely.

    My honest advice: batch-roast the potatoes and cook the steak fresh to order — it takes five minutes in a pan. That keeps the part that suffers from reheating fresh, and the slower-cooking part done ahead.

    Free · the 7-day “Get Fed” plan

    Want a whole week built around food like this?

    Drop your email and I’ll send you my free 7-day plan — meals, macros already counted, grocery list written. No spam, no lectures.

    No spam. Unsubscribe whenever. See what’s in the plan →

    07Common questions

    How do I get really crisp roast potatoes? +

    Three things: parboil them until the edges are just soft, then steam-dry and rough them up in the colander to create fluffy surfaces; use a properly hot tray with hot oil; and give them space so they roast rather than steam. Floury potatoes like Maris Piper crisp best of all.

    What’s the best steak for the money? +

    For a lean, good-value plate I reach for sirloin or rump — plenty of flavour, high protein, less fat than ribeye. If you’re bulking and want richness, ribeye is worth the extra. Either way, dry it well and don’t overcook it; that matters more than the cut.

    Are potatoes really fine when I’m training? +

    Completely. Potatoes are a filling, nutritious carb — lots of potassium and vitamin C, and very satisfying for the calories. There’s no “bad” food here. They fit a build beautifully and, in smaller portions, a cut too. Eat the potatoes, love.

    Can I cook the steak in the oven with the potatoes? +

    You can reverse-sear a thicker steak — warm it low in the oven to your target temperature, then sear hard in a hot pan to finish. For a standard steak, though, a straight pan-sear is faster and gives a better crust. Use the oven mainly for the potatoes.

    How do I know when the steak’s done? +

    A thermometer is the honest answer — about 54°C / 130°F for medium-rare, 60°C / 140°F for medium, pulled a few degrees early to allow for carryover during the rest. A cheap probe takes all the guesswork out and saves a good steak from being overcooked.

    From my 7-day Bulk plan

    This plate lives inside a full week of meals.

    This steak-and-potato plate is one dinner in my 7-day bulking plan — seven days of high-protein, calorie-dense meals with the macros counted and the grocery list written. You pick the goal; I do the maths.

    See the bulking meal plan
    The 7-day bulking meal plan laid out as portioned meals under cold light

    08Pairs well with

    Browse all recipes →

    Magnus Olafsson in his kitchen — bald, bearded and broad, in his pink apron, under cold light
    About the author

    Magnus Olafsson

    I’m Magnus — twenty years under the iron, from a cold gym in Stockholm to the classic-physique stage, and now mostly in my kitchen in a pink apron. I’ve cut for shows, bulked through winters, and I’ve been on TRT since I was thirty-five. I know what it takes to eat for the body you’re chasing, and I know it shouldn’t come with a side of shame.

    Everything here is food I actually cook and macros I actually count. I don’t diagnose, I don’t promise, and I never make a number up. I just feed you well and tell you the truth.

    NPC Illinois NPC Classic Physique On TRT since 35 20 years training

    Slim Diet Era shares recipes and general nutrition information. It is not medical or dietetic advice, and we do not provide guidance on obtaining or using any controlled substance. See our Medical Disclaimer and Nutrition Disclaimer.
  • Anabolic French Toast

    Anabolic French Toast

    Recipe · Bulking / Breakfast / High-protein

    Anabolic French Toast

    Thick, golden French toast soaked in a protein-rich custard — about 41 grams of protein and 520 honest calories. All the comfort of a weekend breakfast with the macros to match a building day. The breakfast that feels like a treat but works like a meal.

    GoalBulk
    Total time15 min
    Servings1 plate
    Protein / serving41 g
    Calories / serving520 kcal
    A stack of golden French toast topped with berries and a dusting of cinnamon, under cold light Plate 01 / Finished

    French toast was a Sunday thing in my family long before I ever touched a barbell — my mother made it on cold Stockholm mornings, the pan spitting and the whole flat smelling of cinnamon. When I started taking training seriously I missed it, because the classic version is mostly white bread and butter and not a lot else. So I rebuilt it. More egg and a scoop of protein in the custard, good bread that holds its shape, and suddenly the breakfast I grew up with had 41 grams of protein in it. My mother would approve, I think.

    The word “anabolic” gets thrown around a lot, and honestly all it means here is that the breakfast actually carries protein instead of just sugar. The custard is doing the work — eggs and whey soaking into the bread so every bite is rich and custardy in the middle, crisp and golden at the edges. About 520 calories of food that feels like a proper weekend treat but sits inside a sensible building day. No powders pretending to be a meal — this is real breakfast, just built smarter.

    I make this on the mornings I want breakfast to feel like something, not just fuel. It takes fifteen minutes, it makes the kitchen smell wonderful, and it never feels like I’m eating “for my goals” — it just feels like a good plate of French toast. That contrast is the whole reason this site exists. Make it once on a slow morning and I think it’ll become your Sunday too. I’ve got you on this one.

    01Who it’s for & when to eat it

    This is a comforting, high-protein breakfast that flexes to your goal. The custard and bread stay the same; you move the toppings and the bread choice. Here’s how I steer it.

    On a bulk

    The default plate

    Thick bread, full custard, berries, a drizzle of maple syrup and a spoon of nut butter. Calorie-dense and properly satisfying — the weekend breakfast that still feeds the build.

    On a cut

    Lighten it

    Use wholegrain bread, swap whole eggs for extra whites, skip the syrup and lean on berries and a little yoghurt. You keep the comfort and protein for far fewer calories. See the variations below.

    On TRT

    Steady fuel

    Wholegrain bread, the full custard, berries and a sensible drizzle. Balanced carbs, protein and a little good fat to keep you full through the morning without overshooting the day.

    Timing: a weekend breakfast at heart — slow morning, hot pan, no rush. It also makes a lovely post-training meal when you fancy something sweet and comforting that still lands your protein.

    02Ingredients

    Makes 1 plate — two thick slices. Doubling is easy; just cook in batches so the pan stays hot and the toast goes golden, not pale.

    Servings 1 · adjust on the live recipe card
    • Thick bread day-old is best2 slices · ~90 g
    • Eggs2 large
    • Whey protein vanilla15 g · 1/2 scoop
    • Milk or plant milk60 ml · 1/4 cup
    • Cinnamon1 tsp
    • Vanilla extract1/2 tsp
    • Mixed berries to top80 g · 2.8 oz
    • Butter or oil to cook1 tsp · 5 g
    • Pinch of saltto taste

    Swaps I actually use: for a cut, drop one yolk and add an extra white, use wholegrain bread, and skip the syrup. No whey? Use casein or a plant protein, or just leave it out and add an extra egg white — you’ll still clear 30g of protein. Day-old bread soaks better than fresh; if yours is soft, toast it lightly first so it doesn’t fall apart.

    03Step by step

    Make the custard

    Whisk eggs, milk, protein, spice

    In a wide, shallow dish, whisk the eggs, milk, protein powder, cinnamon, vanilla and a pinch of salt until completely smooth. Whisk the protein in properly — any lumps now will be lumps on your toast later.

    Magnus says: a wide dish lets the bread lie flat and soak evenly. A deep bowl just makes a mess.

    Eggs, milk, protein and cinnamon whisked into a smooth custard
    Soak the bread

    Let it drink the custard

    Lay the bread in the custard and leave it 30 seconds a side, pressing gently so it soaks right through. You want it saturated but not collapsing — day-old bread handles this far better than fresh, soft slices.

    Thick bread slices soaking in the protein custard
    Heat the pan

    Medium heat, a little fat

    Melt the butter or oil in a non-stick pan over medium heat. Not too hot — protein in the custard browns faster than plain egg, so a gentle, steady heat gives you golden toast instead of a burnt outside and raw middle.

    Magnus says: with protein in the mix, patience beats high heat every time. Low and slow to golden.

    Butter melting in a non-stick pan over medium heat
    Cook side one

    Golden and set before you flip

    Lay the soaked bread in the pan and cook two to three minutes until the underside is deep golden and the edges look set. Don’t rush the flip — moving it too early tears the custardy crust you’re after.

    French toast cooking to golden on the first side
    Flip & finish

    Cook through on the second side

    Flip and cook another two to three minutes until both sides are golden and the centre is cooked through, not wet. Press the middle gently — it should feel set, with a little custardy give but no raw squish.

    French toast flipped and cooking golden on the second side
    Plate & top

    Stack it, pile on the berries

    Stack the toast on a plate, pile the berries on top, dust with a little extra cinnamon and add a drizzle of syrup or a spoon of yoghurt if you like. Eat it hot, while the middle’s still soft. A proper weekend plate.

    The finished stack of French toast topped with berries

    04The spec sheet

    Real numbers, calculated — not guessed. The recipe makes 1 plate, around 280g of finished toast with berries. Here’s what the full plate and a flat 100g actually give you.

    Macros — per serving & per 100g
    NutrientPer servingPer 100g
    Energy520 kcal186 kcal
    Protein41.0 g14.6 g
    Carbohydrate48.0 g17.1 g
    — of which sugars14.0 g5.0 g
    Fat17.0 g6.1 g
    — of which saturates5.5 g2.0 g
    Fibre5.0 g1.8 g
    Sodium~0.6 g~0.21 g
    Calorie density
    186 kcal / 100g

    Moderate, for a breakfast that eats like a treat. Filling without being heavy — easy to fit into a building day and still leave room for the rest of your meals.

    Protein per 100 kcal
    7.9 g / 100 kcal

    A lifter’s metric. Genuinely strong for something this comforting — the egg-and-whey custard turns an ordinary breakfast into a real protein hit.

    Key micros (per serving, approx.)
    • Vitamin B12~1.6 µg · 67% DV
    • Riboflavin (B2)~0.8 mg · 62% DV
    • Selenium~35 µg · 64% DV
    • Choline~290 mg · 53% DV
    • Calcium~200 mg · 15% DV
    • Vitamin C~12 mg · 13% DV

    Macros are calculated from standard food-composition data and will shift a little with your exact ingredients and brands. Micronutrient figures are estimates against general adult Daily Values. Numbers are for guidance, not medical advice — see our Nutrition Disclaimer.

    05Bulk / Cut / TRT variations

    One plate, three jobs. The custard-and-bread base holds; you move the bread, the eggs, and the toppings. Macros below are for a full serving (one plate built as described).

    Bulk

    Build it up

    Three thick slices of brioche-style bread, full custard, berries, maple syrup and a spoon of peanut butter on top. Rich, calorie-dense, and a genuine joy to eat on a building day.

    740Kcal
    46G Protein
    28G Fat
    Cut

    The lean version

    Wholegrain bread, custard made with 1 egg plus 3 whites, no syrup, topped with berries and a spoon of fat-free yoghurt. Keeps the comfort and the protein, drops the calories right down.

    360Kcal
    38G Protein
    7G Fat
    TRT

    Steady & balanced

    Wholegrain bread, the full custard, berries and a light drizzle of syrup. Balanced carbs, protein and a little good fat to keep you full through the morning without tipping the day over.

    480Kcal
    41G Protein
    14G Fat

    06Meal prep & storage

    French toast is a fresh-off-the-pan food at heart, but it does reheat far better than you’d expect — so a batch on a Sunday gives you a few easy breakfasts through the week.

    Fridge
    3 days

    Cool the cooked toast fully, then box it flat. Keep the berries and toppings separate and add them fresh on the day you eat.

    Freezer
    2 months

    Freeze cooked, cooled slices in a single layer, then bag. They reheat straight from frozen, which makes for a very quick weekday breakfast.

    Reheat
    5 min

    The toaster or oven is best — it brings back the crisp edges. From frozen, a few minutes in the toaster or 8 in a hot oven does the job. Skip the microwave; it goes soggy.

    My move: cook a batch of six on a Sunday, freeze them flat, and pop them in the toaster on busy mornings. Crisp outside, soft middle, full protein — and no whisking custard before you’ve had your coffee.

    Free · the 7-day “Get Fed” plan

    Want a whole week built around food like this?

    Drop your email and I’ll send you my free 7-day plan — meals, macros already counted, grocery list written. No spam, no lectures.

    No spam. Unsubscribe whenever. See what’s in the plan →

    07Common questions

    Why did my French toast burn on the outside but stay raw inside? +

    Too high a heat. Protein in the custard browns faster than plain egg, so it catches before the middle cooks through. Drop to a steady medium, give each side two to three patient minutes, and you’ll get golden outsides with a set, custardy centre.

    What bread works best? +

    Thick, sturdy, slightly stale bread — a day-old sourdough, a thick wholegrain, or a brioche-style loaf for a bulk. Day-old bread soaks up the custard without falling apart. If yours is too fresh and soft, toast it lightly first to firm it up.

    Can I leave the protein powder out? +

    You can. Add an extra egg or two egg whites to the custard instead and you’ll still land around 30g of protein. The whey just bumps it higher and adds a little sweetness, but the recipe works fine without it.

    How do I keep it lower in sugar? +

    Skip the syrup and lean on berries and cinnamon for sweetness — they do more than you’d think. A spoon of plain yoghurt adds richness without the sugar hit, and using vanilla protein in the custard means the toast itself is already lightly sweet.

    Can I make it dairy-free? +

    Yes — use a plant milk in the custard, a plant protein, and cook in oil instead of butter. The texture’s almost identical. Top with berries and a dairy-free yoghurt and you’d never miss the dairy.

    From my 7-day Bulk plan

    This breakfast lives inside a full week of meals.

    This French toast is one breakfast in my 7-day bulking plan — seven days of high-protein, calorie-dense meals with the macros counted and the grocery list written. You pick the goal; I do the maths.

    See the bulking meal plan
    The 7-day bulking meal plan laid out as portioned meals under cold light

    08Pairs well with

    Browse all recipes →

    Magnus Olafsson in his kitchen — bald, bearded and broad, in his pink apron, under cold light
    About the author

    Magnus Olafsson

    I’m Magnus — twenty years under the iron, from a cold gym in Stockholm to the classic-physique stage, and now mostly in my kitchen in a pink apron. I’ve cut for shows, bulked through winters, and I’ve been on TRT since I was thirty-five. I know what it takes to eat for the body you’re chasing, and I know it shouldn’t come with a side of shame.

    Everything here is food I actually cook and macros I actually count. I don’t diagnose, I don’t promise, and I never make a number up. I just feed you well and tell you the truth.

    NPC Illinois NPC Classic Physique On TRT since 35 20 years training

    Slim Diet Era shares recipes and general nutrition information. It is not medical or dietetic advice, and we do not provide guidance on obtaining or using any controlled substance. See our Medical Disclaimer and Nutrition Disclaimer.
  • Peanut-Butter Protein Oats

    Peanut-Butter Protein Oats

    Recipe · Bulking / Breakfast / High-protein

    Peanut-Butter Protein Oats

    Creamy hot oats stirred through with peanut butter and protein — about 40 grams of protein and 640 honest calories. A warm, filling breakfast that gets real fuel into you fast on a building day. Five minutes, one pot, and you’re properly fed.

    GoalBulk
    Total time8 min
    Servings1 bowl
    Protein / serving40 g
    Calories / serving640 kcal
    A bowl of creamy peanut-butter protein oats topped with banana and a swirl of peanut butter, under cold light Plate 01 / Finished

    For years I struggled to eat enough in the mornings during a build. I’d train fasted out of habit, then spend the rest of the day chasing calories I should have eaten at breakfast. Oats fixed that. A big warm bowl first thing, with peanut butter for the calories and a scoop of protein to push the numbers up, and suddenly I was 640 calories and 40 grams of protein into my day before I’d properly woken up. Everything else got easier from there.

    This is the breakfast I make half-asleep, the kind you can stir together while the kettle’s still going. Oats give you slow, steady carbs that carry you to lunch without a crash; the peanut butter brings good fats and that rich, comforting flavour; the protein turns it from a snack into a meal that actually holds you. I top it with banana for the sweetness and a little potassium, but the base is the same every day — warm, creamy, and genuinely something I look forward to.

    I’ll be honest, I cook this more than almost anything else on the site. It’s not clever and it’s not fancy. It’s just a sturdy, reliable bowl that gets real fuel into you when your appetite hasn’t woken up yet. On a bulk it’s a quiet workhorse; on any morning it’s a kind way to start the day. Make it once your way and you’ll have your morning sorted for good. I’ve got you on this one.

    01Who it’s for & when to eat it

    This is a warm, high-protein breakfast that flexes to your goal. The oats and protein stay the same; you move the peanut butter and the toppings. Here’s how I steer it.

    On a bulk

    The default bowl

    Full oats, a generous spoon of peanut butter, protein scoop, banana and a drizzle of honey. Calorie-dense, easy to eat first thing — exactly how I get the day off to a strong start on a build.

    On a cut

    Lighten it

    Use powdered peanut butter, drop the oats a little, and lean on the protein and berries. You keep the warm, satisfying feel for far fewer calories. See the variations below.

    On TRT

    Steady fuel

    A moderate oat portion with the full protein and a sensible spoon of peanut butter. Balanced carbs, fats and protein to keep you full through the morning without overshooting the day.

    Timing: a breakfast first and foremost — slow carbs to carry you to lunch and protein to start the day’s intake strong. It’s also a solid pre-training meal a couple of hours out, when you want fuel that won’t sit heavy.

    02Ingredients

    Makes 1 bowl. Easy to double — just give the pot a stir to stop the oats catching as they thicken.

    Servings 1 · adjust on the live recipe card
    • Rolled oats60 g · 2/3 cup
    • Milk or plant milk250 ml · 1 cup
    • Whey protein vanilla30 g · 1 scoop
    • Peanut butter20 g · 1 tbsp
    • Banana, sliced1 small
    • Honey optional1 tsp · 7 g
    • Cinnamon1/2 tsp
    • Pinch of saltto taste

    Swaps I actually use: for a cut, swap the spoonful of peanut butter for powdered peanut (PB2) — most of the flavour, a fraction of the fat. No whey? Casein gives a thicker, creamier bowl, or use a plant protein you like. Almond or skimmed milk both work; skimmed cuts a little fat, plant milk keeps it dairy-free. Berries instead of banana lower the sugar.

    03Step by step

    Start the oats

    Oats, milk, salt into the pot

    Tip the oats, milk and a pinch of salt into a small pot over medium heat. The salt isn’t optional — it’s what stops the oats tasting flat. Bring it to a gentle simmer, stirring now and then.

    Magnus says: a pinch of salt makes oats taste like food instead of wallpaper paste. Always.

    Oats and milk starting to simmer in a small pot
    Cook them creamy

    Simmer and stir to thicken

    Let the oats simmer for three to four minutes, stirring often, until they’re thick and creamy. Add a splash more milk if they tighten up too much — you want soft and pourable, not stiff and gluey.

    Oats thickening to a creamy texture in the pot
    Cool slightly

    Off the heat before the protein goes in

    Take the pot off the heat and let it cool for a minute. This matters — stirring whey into bubbling-hot oats can make it clump or go grainy. A short rest keeps the texture smooth.

    Magnus says: hot enough to eat, not hot enough to scramble the protein. Patience for sixty seconds.

    The pot of oats resting off the heat for a minute
    Stir in protein

    Whey and cinnamon, beat it smooth

    Add the protein powder and cinnamon and stir hard until it’s fully dissolved and silky. If it’s too thick now, loosen with a little more milk. You want a smooth, even bowl with no powdery pockets.

    Protein powder and cinnamon stirred through the oats until smooth
    Add the peanut butter

    Swirl it through

    Spoon in the peanut butter and stir most of it through, leaving a little to swirl on top. The warmth of the oats melts it into the bowl and pulls the whole thing together into something rich and comforting.

    Peanut butter swirled through the protein oats
    Top & eat

    Banana, honey, the last swirl of PB

    Tip into a bowl and top with sliced banana, the reserved peanut butter and a drizzle of honey if you like. Eat it warm, straight away, while it’s at its creamiest. A proper start to a building day.

    The finished bowl of peanut-butter protein oats topped with banana

    04The spec sheet

    Real numbers, calculated — not guessed. The recipe makes 1 bowl, around 420g of finished oats with toppings. Here’s what the full bowl and a flat 100g actually give you.

    Macros — per serving & per 100g
    NutrientPer servingPer 100g
    Energy640 kcal152 kcal
    Protein40.0 g9.5 g
    Carbohydrate72.0 g17.1 g
    — of which sugars28.0 g6.7 g
    Fat20.0 g4.8 g
    — of which saturates5.0 g1.2 g
    Fibre8.0 g1.9 g
    Sodium~0.35 g~0.08 g
    Calorie density
    152 kcal / 100g

    Moderate, and easy to eat a lot of when your appetite’s slow. On a bulk that’s gold — real morning calories that go down without a fight.

    Protein per 100 kcal
    6.3 g / 100 kcal

    A lifter’s metric. Strong for a breakfast carb bowl — the protein scoop does the heavy lifting and turns plain oats into a real meal.

    Key micros (per serving, approx.)
    • Calcium~350 mg · 27% DV
    • Magnesium~140 mg · 33% DV
    • Potassium~900 mg · 19% DV
    • Phosphorus~450 mg · 64% DV
    • Vitamin B12~1.2 µg · 50% DV
    • Iron~3 mg · 17% DV

    Macros are calculated from standard food-composition data and will shift a little with your exact ingredients and brands. Micronutrient figures are estimates against general adult Daily Values. Numbers are for guidance, not medical advice — see our Nutrition Disclaimer.

    05Bulk / Cut / TRT variations

    One bowl, three jobs. The oat-and-protein base holds; you move the peanut butter, the oats, and the toppings. Macros below are for a full serving (one bowl built as described).

    Bulk

    Build it up

    80g oats, a heaped tablespoon of peanut butter, a full scoop of protein, banana and honey, with a handful of crushed nuts on top. Easy, calorie-dense morning fuel for a hard build.

    820Kcal
    44G Protein
    30G Fat
    Cut

    The lean version

    40g oats, powdered peanut (PB2) instead of the spoonful, full protein, skimmed milk and a handful of berries instead of banana. Warm and satisfying, far fewer calories, protein kept high.

    340Kcal
    38G Protein
    6G Fat
    TRT

    Steady & balanced

    60g oats, a sensible spoon of peanut butter, full protein and banana. Balanced carbs, fats and protein that keep you full through the morning without tipping the day over.

    560Kcal
    40G Protein
    16G Fat

    06Meal prep & storage

    Hot oats are best fresh, but the dry mix preps beautifully and you can make the cooked bowl ahead if mornings are chaos. Here’s how I keep it quick all week.

    Dry jars
    Weeks

    Portion oats, protein and cinnamon into jars ahead. In the morning just add milk and the peanut butter and cook — thirty seconds of prep saved every day.

    Cooked, fridge
    3 days

    Cooked oats keep three days. They thicken as they sit, so loosen with a splash of milk when you reheat. Add fresh banana on the day.

    Reheat
    90 sec

    Microwave with a splash of milk, stirring halfway. Or eat them cold like overnight oats — they’re surprisingly good that way once the protein’s stirred through.

    My move is the dry jars — five of them lined up on a Sunday means breakfast is two minutes of work every weekday. On a bulk, having the morning calories sorted in advance is half the battle won.

    Free · the 7-day “Get Fed” plan

    Want a whole week built around food like this?

    Drop your email and I’ll send you my free 7-day plan — meals, macros already counted, grocery list written. No spam, no lectures.

    No spam. Unsubscribe whenever. See what’s in the plan →

    07Common questions

    Why did my protein go clumpy? +

    You stirred it into oats that were too hot. Take the pot off the heat and let it cool for a minute before the whey goes in, then stir hard. If it’s still grainy, a splash of cold milk and a good beat usually smooths it out. Casein and plant proteins are more forgiving of heat if it keeps happening.

    Can I make this in the microwave? +

    Yes. Cook the oats and milk in a big bowl for two to three minutes, watching it doesn’t boil over, then let it cool a minute before stirring in the protein and peanut butter. Same result, one bowl, no pot to wash.

    How do I lower the calories for a cut? +

    Two easy moves: swap the spoon of peanut butter for powdered peanut, and drop the oats to 40g. Keep the full protein scoop and use berries instead of banana. That takes the bowl down to around 340 calories while keeping it warm and properly filling. See the Cut variation above.

    Can I use steel-cut or instant oats? +

    Both work with a tweak. Steel-cut take longer and want more liquid — lovely if you have the time. Instant oats cook in a flash but go softer; reduce the milk slightly so they don’t turn to soup. Rolled oats are my middle-ground default.

    Is it fine to eat cold? +

    Genuinely, yes — cook it the night before, stir the protein through once it’s cooled, and eat it cold from the fridge like overnight oats. It thickens beautifully and the peanut butter flavour deepens overnight. A good option for chaotic mornings.

    From my 7-day Bulk plan

    This breakfast lives inside a full week of meals.

    These oats are one breakfast in my 7-day bulking plan — seven days of high-protein, calorie-dense meals with the macros counted and the grocery list written. You pick the goal; I do the maths.

    See the bulking meal plan
    The 7-day bulking meal plan laid out as portioned meals under cold light

    08Pairs well with

    Browse all recipes →

    Magnus Olafsson in his kitchen — bald, bearded and broad, in his pink apron, under cold light
    About the author

    Magnus Olafsson

    I’m Magnus — twenty years under the iron, from a cold gym in Stockholm to the classic-physique stage, and now mostly in my kitchen in a pink apron. I’ve cut for shows, bulked through winters, and I’ve been on TRT since I was thirty-five. I know what it takes to eat for the body you’re chasing, and I know it shouldn’t come with a side of shame.

    Everything here is food I actually cook and macros I actually count. I don’t diagnose, I don’t promise, and I never make a number up. I just feed you well and tell you the truth.

    NPC Illinois NPC Classic Physique On TRT since 35 20 years training

    Slim Diet Era shares recipes and general nutrition information. It is not medical or dietetic advice, and we do not provide guidance on obtaining or using any controlled substance. See our Medical Disclaimer and Nutrition Disclaimer.
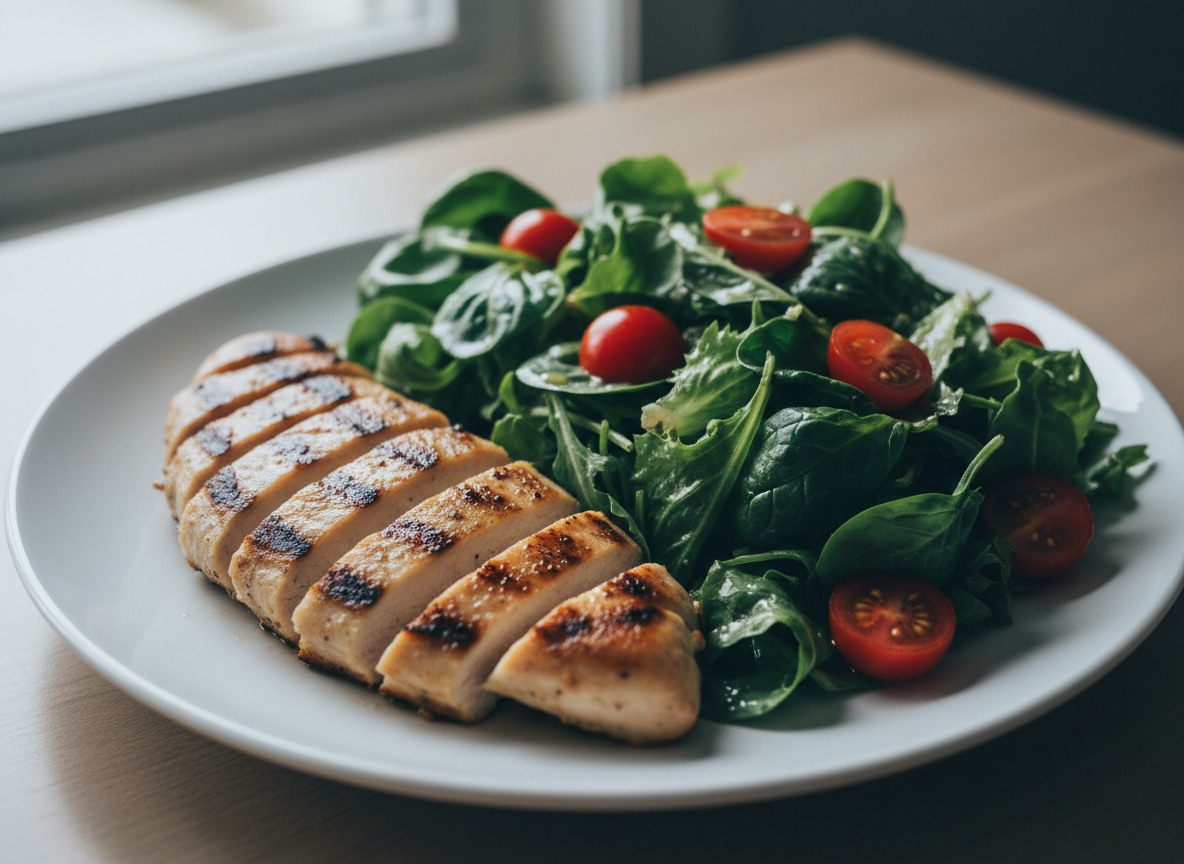
  • Loaded Beef Burrito Bowl

    Loaded Beef Burrito Bowl

    Recipe · Bulking / Beef / High-protein

    Loaded Beef Burrito Bowl

    Spiced beef, rice, beans, corn and all the good toppings in one loaded bowl — about 50 grams of protein and 780 honest calories. Everything you love about a burrito, built for your macros and easy to scale. Big flavour, big plate, no compromise.

    GoalBulk
    Total time30 min
    Servings2 bowls
    Protein / serving50 g
    Calories / serving780 kcal
    A loaded beef burrito bowl with rice, beans, corn, salsa and avocado, plated under cold light Plate 01 / Finished

    There was a little burrito place near my old gym in Stockholm that I’d hit after a heavy session, back when I cared more about being full than being precise. I loved it, but I never quite knew what I was eating — and when I started competing seriously, the guesswork wouldn’t do. So I went home and learned to build the same thing in a bowl, where I could see every component and count it honestly. It scratched exactly the same itch, and now I knew the numbers cold. That’s been the story of my whole kitchen, really: take the food I love and make it answer to me.

    This is comfort food that happens to be brilliantly suited to a bulk. Spiced beef for the protein, rice and beans and corn for the carbs and fibre, then the toppings that make it feel like a treat rather than fuel — salsa, a little cheese, a spoon of guac. About 50 grams of protein and 780 calories of food that genuinely excites me to eat. Nobody at the table would guess it was built around macros, which is exactly how I like it.

    I make a big batch of the beef and let everyone build their own bowls — heavy on the toppings for the bulkers, lighter for whoever’s leaning out. It’s a generous, social plate, the kind that makes eating for a goal feel like dinner instead of a chore. Cook the beef once and you’ll have burrito bowls in your rotation for good. I’ve got you on this one.

    01Who it’s for & when to eat it

    This is a loaded, high-protein bowl that flexes to your goal. The spiced beef stays the same; you adjust the rice, the toppings, and the cut of beef. Here’s how I steer it.

    On a bulk

    The default plate

    Full rice, beans, corn, and all the toppings — cheese, salsa, guac. Calorie-dense and deeply satisfying, the bowl I build after a hard session when I want to refill and enjoy it.

    On a cut

    Lighten the load

    Use 5% beef, drop the rice to a fist, skip the cheese, and lean on salsa and extra leaves. You keep all the flavour and protein for far fewer calories. See the variations below.

    On TRT

    Steady fuel

    A moderate rice scoop, lean beef, beans and a little avocado for good fats. Balanced protein, carbs and fibre that keep you full and satisfied without overshooting the day.

    Timing: a brilliant post-training meal — protein, carbs and fibre all in one loaded bowl. It also preps and reheats well, so it’s a favourite of mine for a midday meal that doesn’t feel like sad desk food.

    02Ingredients

    Makes 2 bowls. The beef and the bowl base scale easily — this is a great one to batch for a build-your-own night.

    Servings 2 · adjust on the live recipe card
    • Beef mince 10% fat350 g · 12 oz
    • Jasmine rice dry weight140 g · 5 oz
    • Black beans drained, tinned200 g · 7 oz
    • Sweetcorn120 g · 4.2 oz
    • Tomato salsa100 g · 3.5 oz
    • Grated cheese40 g · 1.4 oz
    • Avocado1/2
    • Taco seasoning cumin, paprika, chilli, oregano2 tbsp
    • Lime1
    • Salt & black pepperto taste

    Swaps I actually use: drop to 5% beef and skip the cheese for a much leaner cut bowl — the salsa and lime carry plenty of flavour. No avocado? A spoon of plain Greek yoghurt cools it down and adds protein. Chicken mince or turkey mince swap straight in for the beef. Make your own seasoning from cumin, paprika, chilli and oregano to control the sodium.

    03Step by step

    Rice on

    Start the rice first

    Rinse the jasmine rice until the water clears, then cook it. It takes the longest, so get it going and let it steam covered while you cook the beef and prep the toppings. Stir a squeeze of lime through it at the end for a fresh lift.

    Jasmine rice rinsed and cooking in a pot
    Brown the beef

    Sear it hard in a hot pan

    Heat a wide pan over high. Add the beef, press it flat, and leave it a minute to brown before breaking it up. You want real colour on the meat — that’s where the deep, savoury flavour comes from.

    Magnus says: don’t crowd it cold. Hot pan, leave it, then stir — grey mince is just steamed mince.

    Beef mince browning in a hot wide pan
    Season

    Spice it, then loosen with water

    Stir the taco seasoning through the browned beef, then add a splash of water and let it bubble for a minute or two so the spices bloom and coat every bit. Taste and adjust the salt — go easy if your seasoning’s already salty.

    Taco seasoning stirred into the browned beef with a splash of water
    Warm the beans & corn

    A quick warm-through

    Tip the drained beans and the corn into the pan with the beef, or warm them in a separate pan if it’s crowded. A couple of minutes is all they need — just hot through and glossy, not mushy.

    Black beans and corn warming with the spiced beef
    Prep toppings

    Slice the avocado, grate the cheese

    While everything warms, slice or mash the avocado with a squeeze of lime, grate the cheese, and get the salsa ready. Having the toppings prepped means you build the bowls hot and eat them straight away.

    Sliced avocado, grated cheese and salsa prepped for the bowls
    Build the bowls

    Layer it up and load it on

    Rice down first, then the spiced beef, beans and corn. Top with salsa, cheese and avocado, and finish with a final squeeze of lime and some fresh coriander if you have it. Build it generous and eat it warm.

    Magnus says: a little of everything in each forkful is the whole point. Don’t be shy with the layers.

    The finished loaded burrito bowl with all the toppings

    04The spec sheet

    Real numbers, calculated — not guessed. The recipe makes 2 bowls, around 940g of loaded food total. Here’s what one bowl (about 470g) and a flat 100g actually give you.

    Macros — per serving & per 100g
    NutrientPer servingPer 100g
    Energy780 kcal166 kcal
    Protein50.0 g10.6 g
    Carbohydrate74.0 g15.7 g
    — of which sugars7.0 g1.5 g
    Fat28.0 g6.0 g
    — of which saturates9.5 g2.0 g
    Fibre11.0 g2.3 g
    Sodium~0.9 g~0.19 g
    Calorie density
    166 kcal / 100g

    Moderate-high, carried by the beef and toppings. On a bulk that’s the point — real calories from a generous, satisfying bowl rather than an endless one.

    Protein per 100 kcal
    6.4 g / 100 kcal

    A lifter’s metric. The toppings carry fat, so the density is moderate — but the absolute protein per bowl is strong, and the fibre keeps you full for hours.

    Key micros (per serving, approx.)
    • Vitamin B12~3.5 µg · 146% DV
    • Zinc~8 mg · 73% DV
    • Iron~5 mg · 28% DV
    • Folate~140 µg · 35% DV
    • Vitamin C~20 mg · 22% DV
    • Magnesium~120 mg · 29% DV

    Macros are calculated from standard food-composition data and will shift a little with your exact ingredients and brands. Micronutrient figures are estimates against general adult Daily Values. Numbers are for guidance, not medical advice — see our Nutrition Disclaimer.

    05Bulk / Cut / TRT variations

    One bowl, three jobs. The spiced beef base holds; you move the rice, the cheese, and the toppings. Macros below are for a full serving (one bowl built as described).

    Bulk

    Build it up

    10% beef, 90g dry rice, full beans and corn, all the toppings plus a whole half-avocado and extra cheese. Big, loaded, calorie-dense — the burrito bowl turned all the way up.

    920Kcal
    53G Protein
    40G Fat
    Cut

    The lean version

    5% beef, rice down to a fist (40g dry), skip the cheese, swap avocado for a spoon of salsa and a pile of leaves. All the flavour, full protein, far fewer calories.

    480Kcal
    48G Protein
    12G Fat
    TRT

    Steady & balanced

    Lean beef, a moderate 60g dry rice, full beans, a little avocado for good fats and salsa to finish. Balanced protein, carbs and fibre that keep you full without overshooting.

    650Kcal
    49G Protein
    22G Fat

    06Meal prep & storage

    The base of this bowl is a meal-prep dream — the spiced beef, rice, beans and corn all keep and reheat beautifully. I prep those ahead and add the fresh toppings the day I eat, so nothing goes sad in the fridge.

    Fridge
    4 days

    Box the beef, rice, beans and corn together. Keep avocado, cheese and fresh salsa separate and add them when you eat, so they stay fresh.

    Freezer
    3 months

    The cooked base freezes well as a complete meal. Cool fully, bag flat, and thaw overnight in the fridge. Don’t freeze the avocado or fresh toppings.

    Reheat
    3 min

    Microwave the base covered with a splash of water over the rice. Then pile on the cold, fresh toppings — that hot-and-cold contrast is part of what makes it good.

    For prep I box the warm base in portions and keep a little tub of toppings on the side. Two minutes to reheat, thirty seconds to load it up, and you’ve got a proper meal that beats anything from the freezer aisle.

    Free · the 7-day “Get Fed” plan

    Want a whole week built around food like this?

    Drop your email and I’ll send you my free 7-day plan — meals, macros already counted, grocery list written. No spam, no lectures.

    No spam. Unsubscribe whenever. See what’s in the plan →

    07Common questions

    Can I use chicken or turkey instead of beef? +

    Easily. Chicken or turkey mince both take the taco seasoning well and come out leaner than beef. Just cook them through fully and don’t let them dry out — a splash of water and the salsa keep everything juicy. The protein stays high; the fat and calories drop a little.

    How do I keep the sodium sensible? +

    Make your own seasoning from cumin, paprika, chilli powder and oregano rather than a shop packet, rinse the tinned beans, and go easy on the cheese and shop salsa. You’ll barely notice the difference in flavour, and you’ll keep far more control over the salt.

    Can I turn this into an actual burrito? +

    Of course — wrap the same filling in a large tortilla. Just remember the wrap adds calories and carbs, so account for it. The bowl version is easier to count and lets you load more veg, which is why I usually go bowl over wrap.

    What’s the best way to scale this for a group? +

    Cook a big batch of the spiced beef and a big pot of rice, lay out all the toppings, and let everyone build their own. Bulkers go heavy on rice and cheese, anyone cutting leans on leaves and salsa — same base, everyone hits their own macros.

    Can I make it dairy-free? +

    Yes — drop the cheese and lean on avocado, salsa and lime for richness and flavour. A spoon of a dairy-free yoghurt works as the cooling element if you miss it. The bowl honestly holds up beautifully without the cheese.

    From my 7-day Bulk plan

    This bowl lives inside a full week of meals.

    This burrito bowl is one plate in my 7-day bulking plan — seven days of high-protein, calorie-dense meals with the macros counted and the grocery list written. You pick the goal; I do the maths.

    See the bulking meal plan
    The 7-day bulking meal plan laid out as portioned meals under cold light

    08Pairs well with

    Browse all recipes →

    Magnus Olafsson in his kitchen — bald, bearded and broad, in his pink apron, under cold light
    About the author

    Magnus Olafsson

    I’m Magnus — twenty years under the iron, from a cold gym in Stockholm to the classic-physique stage, and now mostly in my kitchen in a pink apron. I’ve cut for shows, bulked through winters, and I’ve been on TRT since I was thirty-five. I know what it takes to eat for the body you’re chasing, and I know it shouldn’t come with a side of shame.

    Everything here is food I actually cook and macros I actually count. I don’t diagnose, I don’t promise, and I never make a number up. I just feed you well and tell you the truth.

    NPC Illinois NPC Classic Physique On TRT since 35 20 years training

    Slim Diet Era shares recipes and general nutrition information. It is not medical or dietetic advice, and we do not provide guidance on obtaining or using any controlled substance. See our Medical Disclaimer and Nutrition Disclaimer.
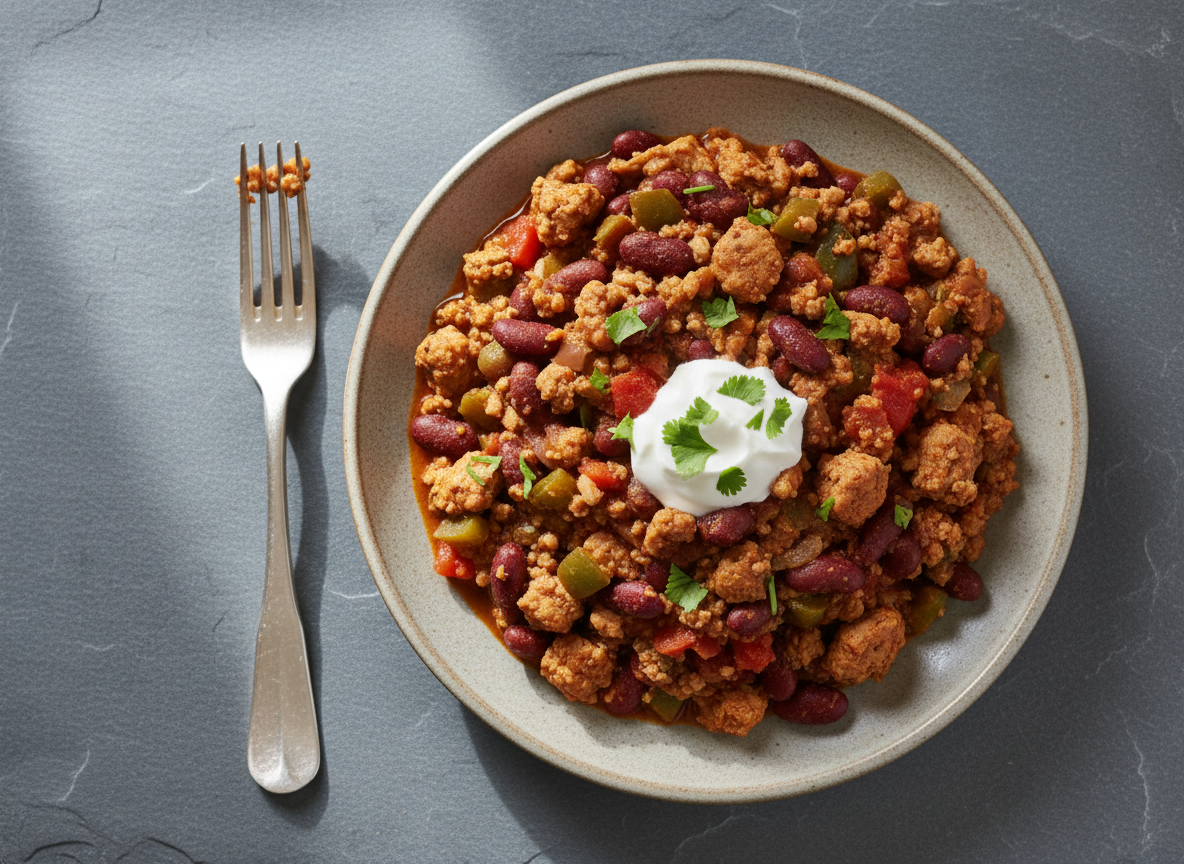
  • Salmon, Sweet Potato and Asparagus

    Salmon, Sweet Potato and Asparagus

    Recipe · Bulking / Fish / High-protein

    Salmon, Sweet Potato and Asparagus

    A crisp-skinned salmon fillet with roasted sweet potato and charred asparagus — about 48 grams of protein and 690 honest calories. Clean fats, slow carbs, and the kind of plate that builds you up while feeling light. Bulking food that doesn’t sit like a brick.

    GoalBulk
    Total time35 min
    Servings1 plate
    Protein / serving48 g
    Calories / serving690 kcal
    A crisp-skinned salmon fillet with roasted sweet potato and charred asparagus, plated under cold light Plate 01 / Finished

    Not every bulking meal has to be a wall of red meat and white rice. I learned that the hard way during one off-season where I ate so much beef and pasta that I felt heavy and sluggish for weeks — strong in the gym, but foggy and bloated the rest of the time. So I started rotating in plates like this one: salmon for the protein and the good fats, sweet potato for slow carbs that don’t leave you crashing, asparagus because it’s quick and it makes the plate feel like dinner rather than fuel. I felt human again within days.

    The fats in salmon are doing real work here. They carry calories — which you want on a bulk — but they sit lighter than a fatty steak, and the omega-3s are good for you in a way I’m happy to put my name to. Roasted sweet potato gives you around 690 honest calories and a steady release of energy, and the asparagus adds colour, fibre and a little char that makes the whole thing taste like you tried. About 48 grams of protein, all from real food.

    This is the plate I cook when I want to build but my appetite’s flagging — it’s substantial without being a slog to eat. I make it on a quiet evening, salmon skin crackling in the pan while the tray roasts, the kitchen smelling of garlic and char. It’s bulking food that respects your gut. Cook it once on a heavy week and you’ll keep coming back. I’ve got you on this one.

    01Who it’s for & when to eat it

    This is a clean, high-protein plate that flexes to your goal. The salmon and asparagus stay the same; you move the sweet potato and the oil. Here’s how I steer it.

    On a bulk

    The default plate

    Full sweet potato, salmon crisped in a little oil, asparagus charred with garlic. Calorie-dense from good fats and slow carbs, light on the gut — ideal when red meat’s starting to sit heavy.

    On a cut

    Lean it out

    Halve the sweet potato, roast everything with just a teaspoon of oil, and double the asparagus. You keep the salmon’s protein and good fats for far fewer calories. See the variations below.

    On TRT

    Steady fuel

    A moderate sweet potato portion with the full salmon fillet and plenty of greens. Quality fats, slow carbs and lean protein — full, satisfied, and gentle on digestion for an evening meal.

    Timing: this makes a lovely evening meal — the slow carbs and good fats keep you full overnight, and it’s light enough not to weigh you down before bed. It also works post-training when you want quality fuel without the heaviness of a big meat plate.

    02Ingredients

    Makes 1 plate. Scale every line in proportion to feed more — give the salmon room in the pan so the skin crisps rather than steams.

    Servings 1 · adjust on the live recipe card
    • Salmon fillet skin on200 g · 7 oz
    • Sweet potato250 g · 8.8 oz
    • Asparagus150 g · 5.3 oz
    • Garlic, crushed2 cloves
    • Olive oil1 tbsp · 15 ml
    • Lemon1/2
    • Smoked paprika1/2 tsp
    • Sea saltto taste
    • Black pepperto taste

    Swaps I actually use: for a cut, halve the sweet potato and roast with the bare minimum of oil — the salmon’s own fat does plenty. No asparagus? Tenderstem broccoli, green beans or courgette all char beautifully on the same tray. Want it bigger for a hard bulk? Add a second small sweet potato and finish the salmon with a spoon of pesto or tahini.

    03Step by step

    Prep the tray

    Cube the sweet potato, oven on

    Heat the oven to 200°C (400°F). Cut the sweet potato into even cubes, toss with half the oil, the paprika, salt and pepper, and spread on a tray. Even cubes roast evenly — a mix of big and small gives you some burnt, some raw.

    Cubed sweet potato tossed with oil and paprika on a roasting tray
    Roast

    Give the potato a head start

    Roast the sweet potato for about 20 minutes, turning once. It needs longer than everything else, so get it going alone — the asparagus joins later so it doesn’t turn to mush before the potato’s soft.

    Sweet potato cubes roasting in the oven
    Dry the salmon

    Pat the skin bone-dry, season

    While the potato roasts, pat the salmon skin completely dry with paper towel and season both sides. Dry skin is the whole secret to a crisp, crackling finish — any moisture and it steams and goes limp.

    Magnus says: a wet salmon skin will never crisp. Dry it properly and you’re halfway to a great fillet.

    A salmon fillet patted dry and seasoned, skin-side up
    Add the asparagus

    Greens onto the tray

    Toss the asparagus with the crushed garlic and a little oil, then add it to the tray with the sweet potato for the last 8 to 10 minutes. You want it tender with a bit of char, not floppy.

    Asparagus added to the roasting tray with the sweet potato
    Crisp the salmon

    Skin-side down, press it flat

    Heat the rest of the oil in a pan over medium-high. Lay the salmon skin-side down and press gently with a spatula for ten seconds so the skin makes full contact. Leave it four to five minutes until crisp, then flip for a minute to finish.

    Magnus says: pressing the fillet down stops the skin curling away from the pan. Hold it just long enough to set.

    A salmon fillet crisping skin-side down in a pan
    Plate

    Build it, squeeze the lemon

    Pile the sweet potato and asparagus onto a plate, lay the salmon on top skin-up so it stays crisp, and squeeze the lemon over the lot. A last pinch of salt and you’re done — substantial, light, and good for you.

    The finished plate of crisp salmon with sweet potato and asparagus

    04The spec sheet

    Real numbers, calculated — not guessed. The recipe makes 1 plate, around 560g of cooked food total. Here’s what the full plate and a flat 100g actually give you.

    Macros — per serving & per 100g
    NutrientPer servingPer 100g
    Energy690 kcal123 kcal
    Protein48.0 g8.6 g
    Carbohydrate52.0 g9.3 g
    — of which sugars14.0 g2.5 g
    Fat32.0 g5.7 g
    — of which saturates6.0 g1.1 g
    Fibre9.0 g1.6 g
    Sodium~0.45 g~0.08 g
    Calorie density
    123 kcal / 100g

    Moderate, and that’s the appeal — you get bulking calories from quality fats without a plate that sits like a brick. Volume and fullness, not heaviness.

    Protein per 100 kcal
    7.0 g / 100 kcal

    A lifter’s metric. The salmon’s fat carries calories, so the protein density is moderate — exactly right for a building plate that’s also good for you.

    Key micros (per serving, approx.)
    • Vitamin A~1300 µg · 144% DV
    • Vitamin B12~5 µg · 208% DV
    • Selenium~45 µg · 82% DV
    • Vitamin D~12 µg · 60% DV
    • Potassium~1300 mg · 28% DV
    • Folate~120 µg · 30% DV

    Macros are calculated from standard food-composition data and will shift a little with your exact ingredients and brands. Micronutrient figures are estimates against general adult Daily Values. Numbers are for guidance, not medical advice — see our Nutrition Disclaimer.

    05Bulk / Cut / TRT variations

    One plate, three jobs. The salmon and asparagus hold steady; you move the sweet potato and the added fat. Macros below are for a full serving (one plate built as described).

    Bulk

    Build it up

    Full sweet potato plus a small extra one, salmon finished with a spoon of pesto, and a generous drizzle of olive oil over the asparagus. Clean, calorie-dense fuel that still sits light.

    880Kcal
    51G Protein
    44G Fat
    Cut

    The lean version

    Halve the sweet potato, roast everything with just a teaspoon of oil, double the asparagus, and lean on the salmon’s own fat. Big plate, quality protein and fats, far fewer calories.

    480Kcal
    46G Protein
    24G Fat
    TRT

    Steady & balanced

    A moderate sweet potato, the full salmon fillet, and plenty of charred greens with lemon. Quality fats, slow carbs and lean protein to keep you full and recovering without overshooting.

    620Kcal
    48G Protein
    30G Fat

    06Meal prep & storage

    Salmon is happiest fresh, but the roasted veg preps brilliantly and cooked salmon keeps well for a couple of days. Here’s how I handle it without ending up with a dry, fishy fridge.

    Fridge
    2 days

    Cooked salmon keeps two days, ideally boxed separately from the veg. Eat it cold over the roasted potato or warm it gently — don’t blast it.

    Freezer
    1 month

    Roasted sweet potato freezes fine; I freeze cooked salmon only if I must. Thaw in the fridge and reheat low and slow to keep it from drying out.

    Reheat
    2 min

    Warm salmon gently — a covered pan or a short, low microwave burst. Overheat it and it dries and toughens. Honestly, cold flaked salmon over warm potato is lovely.

    My move for prep: batch-roast a big tray of sweet potato and asparagus, then cook the salmon fresh to order — it takes five minutes in a pan. That way the part that suffers from reheating is the part you don’t reheat.

    Free · the 7-day “Get Fed” plan

    Want a whole week built around food like this?

    Drop your email and I’ll send you my free 7-day plan — meals, macros already counted, grocery list written. No spam, no lectures.

    No spam. Unsubscribe whenever. See what’s in the plan →

    07Common questions

    How do I stop the salmon skin sticking? +

    Three things: dry the skin thoroughly, get the pan and oil properly hot before the fillet goes in, and then leave it alone. Salmon releases itself from the pan when the skin is crisp — if it’s still stuck, it isn’t ready, so give it another minute before you try to move it.

    Can I use frozen salmon? +

    Yes, and it’s often cheaper. Thaw it fully in the fridge overnight, then pat it very dry — frozen-then-thawed fish holds extra water, so drying it well is even more important if you want crisp skin. The macros are the same.

    Can I swap the sweet potato for regular potato? +

    Absolutely. White or new potatoes roast the same way and the calories are similar. Sweet potato gives you more vitamin A and a slightly sweeter, slower carb, but use whatever you’ve got and enjoy your dinner.

    How do I bump the calories for a hard bulk? +

    Lean on the good fats: a spoon of pesto or tahini on the salmon, a heavier drizzle of olive oil on the veg, and a second small sweet potato. That carries the plate past 880 calories while keeping it real food and easy on the gut. See the Bulk variation above.

    Is the salmon skin worth eating? +

    When it’s properly crisp, it’s the best part — and it carries some of the good fats too. If you’d rather skip it, pull it off after cooking; the macros drop only a little. But cook it crisp once and I think you’ll be a convert.

    From my 7-day Bulk plan

    This plate lives inside a full week of meals.

    This salmon plate is one dinner in my 7-day bulking plan — seven days of high-protein, calorie-dense meals with the macros counted and the grocery list written. You pick the goal; I do the maths.

    See the bulking meal plan
    The 7-day bulking meal plan laid out as portioned meals under cold light

    08Pairs well with

    Browse all recipes →

    Magnus Olafsson in his kitchen — bald, bearded and broad, in his pink apron, under cold light
    About the author

    Magnus Olafsson

    I’m Magnus — twenty years under the iron, from a cold gym in Stockholm to the classic-physique stage, and now mostly in my kitchen in a pink apron. I’ve cut for shows, bulked through winters, and I’ve been on TRT since I was thirty-five. I know what it takes to eat for the body you’re chasing, and I know it shouldn’t come with a side of shame.

    Everything here is food I actually cook and macros I actually count. I don’t diagnose, I don’t promise, and I never make a number up. I just feed you well and tell you the truth.

    NPC Illinois NPC Classic Physique On TRT since 35 20 years training

    Slim Diet Era shares recipes and general nutrition information. It is not medical or dietetic advice, and we do not provide guidance on obtaining or using any controlled substance. See our Medical Disclaimer and Nutrition Disclaimer.
  • Chicken Thighs, Rice and Beans

    Chicken Thighs, Rice and Beans

    Recipe · Bulking / Chicken / High-protein

    Chicken Thighs, Rice and Beans

    Juicy seasoned chicken thighs over rice with a scoop of beans — about 55 grams of protein and 740 honest calories. Cheap, filling, and forgiving, this is the bulking plate I make when the budget’s tight and the appetite isn’t. Real food that goes the distance.

    GoalBulk
    Total time40 min
    Servings2 plates
    Protein / serving55 g
    Calories / serving740 kcal
    Golden seasoned chicken thighs over rice with black beans, plated under cold light Plate 01 / Finished

    When I was young and broke and lifting in a basement gym, this was the meal that built me. Chicken thighs were the cheapest cut going, rice came by the sack, and a tin of beans cost almost nothing — so I learned to make the three of them taste like a proper dinner. Twenty years later I still cook it most weeks, not because I have to, but because I genuinely love it. Some food earns a permanent place at your table, and this earned its place a long time ago.

    Thighs get a bad rap from the breast-only crowd, and I think that’s a shame. They’re juicier, they forgive you if you walk away from the pan for a minute, and they carry seasoning beautifully. Yes, they’re a touch fattier than breast — which on a bulk is exactly what you want, honestly. Pair them with rice for the carbs and beans for the fibre and a little extra protein, and you’ve got around 55 grams of protein and 740 calories of food that actually fills you up and keeps you full.

    This is comfort food with a job to do. I make it for myself after a heavy leg session, I make a double batch to box for the week, and I’ve fed it to friends who had no idea it was a “bulking” meal — they just thought it was good dinner. That’s the whole point. Cook it once and you’ll see why it’s stayed with me all these years. I’ve got you on this one.

    01Who it’s for & when to eat it

    This is a budget-friendly, high-protein plate that flexes to your goal. The thighs and beans stay the same; you move the rice scoop and the skin. Here’s how I steer it.

    On a bulk

    The default plate

    Full rice portion, skin-on thighs, a generous scoop of beans. Calorie-dense, protein-rich, and easy on the wallet. My go-to after a heavy session when I want to eat well and recover hard.

    On a cut

    Lean it out

    Pull the skin off the thighs, drop the rice to a fist, and pile on a side of greens. You keep the juicy chicken and the beans for far fewer calories. See the variations below for numbers.

    On TRT

    Steady fuel

    A moderate rice scoop with skin-on thighs and the full bean portion. Balanced protein, carbs and fibre to keep you full and your digestion happy. A reliable main meal any day.

    Timing: this is a brilliant post-training dinner — protein, carbs and fibre all in one bowl. It also packs and reheats better than almost any chicken dish I know, which makes it a meal-prep staple.

    02Ingredients

    Makes 2 plates. Scale every line in proportion to feed more — thighs hold their juiciness even in a big batch, so this is a friendly one to double.

    Servings 2 · adjust on the live recipe card
    • Chicken thighs boneless450 g · 1 lb
    • Jasmine rice dry weight150 g · 5.3 oz
    • Black beans drained, tinned240 g · 8.5 oz
    • Onion, diced1 small
    • Garlic, grated3 cloves
    • Smoked paprika1.5 tsp
    • Ground cumin1 tsp
    • Olive oil1 tbsp · 15 ml
    • Lime to finish1
    • Salt & black pepperto taste

    Swaps I actually use: pull the skin off the thighs and use less oil to lean the whole plate out for a cut. No black beans? Kidney beans, pinto, or chickpeas all work and keep that fibre and protein up. Want it bigger for a hard bulk? Leave the skin on and add an extra scoop of rice and a drizzle of olive oil over the beans.

    03Step by step

    Rice on

    Get the rice cooking first

    Rinse the jasmine rice until the water clears, then cook it the way you trust. It takes the longest, so start it now and let it steam covered while you cook the chicken and warm the beans.

    Jasmine rice rinsed and cooking in a pot
    Season the thighs

    Dry, then rub with the spice

    Pat the thighs properly dry, then rub them all over with the paprika, cumin, salt and pepper. Dry skin is what gives you a golden, crisp finish; a wet thigh just steams in the pan.

    Magnus says: get the spice right into the meat with your hands. It’s worth a minute and a bit of mess.

    Chicken thighs rubbed with paprika and cumin on a board
    Sear the chicken

    Skin-side down, leave it alone

    Heat the oil in a wide pan over medium-high. Lay the thighs skin-side down and leave them four to five minutes until deep golden, then flip and cook through — chicken should hit 74°C / 165°F. Lift them out to rest.

    Magnus says: render the fat from the skin slowly. Rushing it leaves you flabby skin instead of crisp.

    Chicken thighs searing skin-side down until golden in a wide pan
    The beans

    Soften the onion, warm the beans

    In the same pan with the chicken fat, soften the diced onion for three minutes, then stir in the garlic for thirty seconds. Tip in the drained beans and a splash of water, season, and warm through until glossy.

    Black beans warming with onion and garlic in the chicken pan
    Rest the chicken

    Let the thighs settle

    Give the thighs a couple of minutes to rest while the beans finish — same rule as any meat, it keeps them juicy. Squeeze half the lime over the beans now and stir it through for a bright lift.

    Cooked chicken thighs resting beside the pan of beans
    Plate

    Rice, beans, thighs, lime

    Spoon rice into two plates, add the beans, and lay the thighs on top. A last squeeze of lime, a scatter of fresh coriander if you have it, and you’re done. Eat it warm and feel properly fed.

    The finished plate of chicken thighs over rice and beans

    04The spec sheet

    Real numbers, calculated — not guessed. The recipe makes 2 plates, around 900g of cooked food total. Here’s what one plate (about 450g) and a flat 100g actually give you.

    Macros — per serving & per 100g
    NutrientPer servingPer 100g
    Energy740 kcal164 kcal
    Protein55.0 g12.2 g
    Carbohydrate72.0 g16.0 g
    — of which sugars3.5 g0.8 g
    Fat22.0 g4.9 g
    — of which saturates5.5 g1.2 g
    Fibre9.0 g2.0 g
    Sodium~0.6 g~0.13 g
    Calorie density
    164 kcal / 100g

    Moderate-high, carried by the thighs and rice. On a bulk that’s ideal — real calories from a sensible plate, with the beans adding fibre to keep things moving.

    Protein per 100 kcal
    7.4 g / 100 kcal

    A lifter’s metric. A strong protein density for a high-carb bulking plate, helped by the beans chipping in alongside the chicken.

    Key micros (per serving, approx.)
    • Selenium~35 µg · 64% DV
    • Folate~150 µg · 38% DV
    • Iron~4 mg · 22% DV
    • Zinc~4 mg · 36% DV
    • Vitamin B6~1 mg · 59% DV
    • Magnesium~110 mg · 26% DV

    Macros are calculated from standard food-composition data and will shift a little with your exact ingredients and brands. Micronutrient figures are estimates against general adult Daily Values. Numbers are for guidance, not medical advice — see our Nutrition Disclaimer.

    05Bulk / Cut / TRT variations

    One plate, three jobs. The thighs and beans hold steady; you move the skin, the rice, and the oil. Macros below are for a full serving (one plate built as described).

    Bulk

    Build it up

    Skin-on thighs, 90g dry rice, full beans with a drizzle of olive oil, and a spoon of guacamole on top. Cheap, calorie-dense, and genuinely satisfying — the budget bulker’s dream plate.

    880Kcal
    57G Protein
    34G Fat
    Cut

    The lean version

    Skin off the thighs, sear in a teaspoon of oil, drop the rice to a fist (40g dry) and add a big side of greens. Keep the full bean scoop for fibre and fullness. Lean numbers, same flavour.

    470Kcal
    52G Protein
    11G Fat
    TRT

    Steady & balanced

    Skin-on thighs, a moderate 60g dry rice, full beans, plenty of fresh veg and lime. Balanced protein, carbs and good fats to keep you full and recovering without overshooting the day.

    640Kcal
    54G Protein
    20G Fat

    06Meal prep & storage

    This is one of the best meal-prep plates I know — thighs stay juicy on reheat where breast goes to cardboard, and the beans and rice only get better as they sit. I cook a double batch on a Sunday without thinking twice.

    Fridge
    4 days

    Box the thighs, rice and beans together once fully cooled. The flavour deepens overnight, so day two is honestly better than day one.

    Freezer
    3 months

    Freezes beautifully as a complete meal. Cool fully, bag or box flat, and thaw overnight in the fridge before reheating.

    Reheat
    3 min

    Microwave covered with a splash of water over the rice. The thighs hold their moisture, so this reheats far better than most chicken meals.

    For prep I box one plate per container — thighs on top, rice and beans below. Few proteins survive day four as well as thighs do, which is exactly why this one’s a staple in my fridge.

    Free · the 7-day “Get Fed” plan

    Want a whole week built around food like this?

    Drop your email and I’ll send you my free 7-day plan — meals, macros already counted, grocery list written. No spam, no lectures.

    No spam. Unsubscribe whenever. See what’s in the plan →

    07Common questions

    Can I use chicken breast instead of thighs? +

    You can, and it’ll be leaner — the calories drop and the protein nudges up. Just watch the cooking: breast overcooks and dries out far faster than thigh, so pull it the moment it hits 74°C / 165°F. For a bulk I genuinely prefer thighs; they’re juicier and far more forgiving.

    Are tinned beans fine, or should I cook dried? +

    Tinned are completely fine and what I use most days — just drain and rinse them to wash off some of the sodium. Dried beans are cheaper if you cook them in batches, but for a weeknight plate, tinned saves you an hour with no real loss.

    How do I make this for a hard bulk? +

    Keep the skin on, push the rice up to 90g dry, drizzle olive oil over the beans, and add a spoon of guacamole or some avocado. That carries one plate past 880 calories while staying real food and easy on the budget. See the Bulk variation above.

    Can I cook it all in one pan? +

    The beans, yes — they go straight into the chicken pan to pick up all that rendered flavour. The rice needs its own pot. If you want a true one-pan version, cook the rice separately and just sear the chicken and warm the beans together.

    What can I use instead of lime? +

    Lemon works just as well — you only want that bright acid to cut through the richness at the end. A splash of vinegar in a pinch, or a dollop of plain yoghurt on the side, will do a similar job of lifting the plate.

    From my 7-day Bulk plan

    This plate lives inside a full week of meals.

    This chicken-and-beans plate is one dinner in my 7-day bulking plan — seven days of high-protein, calorie-dense meals with the macros counted and the grocery list written. You pick the goal; I do the maths.

    See the bulking meal plan
    The 7-day bulking meal plan laid out as portioned meals under cold light

    08Pairs well with

    Browse all recipes →

    Magnus Olafsson in his kitchen — bald, bearded and broad, in his pink apron, under cold light
    About the author

    Magnus Olafsson

    I’m Magnus — twenty years under the iron, from a cold gym in Stockholm to the classic-physique stage, and now mostly in my kitchen in a pink apron. I’ve cut for shows, bulked through winters, and I’ve been on TRT since I was thirty-five. I know what it takes to eat for the body you’re chasing, and I know it shouldn’t come with a side of shame.

    Everything here is food I actually cook and macros I actually count. I don’t diagnose, I don’t promise, and I never make a number up. I just feed you well and tell you the truth.

    NPC Illinois NPC Classic Physique On TRT since 35 20 years training

    Slim Diet Era shares recipes and general nutrition information. It is not medical or dietetic advice, and we do not provide guidance on obtaining or using any controlled substance. See our Medical Disclaimer and Nutrition Disclaimer.